Pages

Wednesday, July 23, 2014

Blueberry Oatmeal Muffins

Blueberry Oatmeal MuffinsIt's that time of the year when blueberries are in season. We've got lots of blueberries and I needed to make something with it. I figure muffins would be awesome since we almost never finish cakes or tarts in this house. While I'm at it, why not make them a little healthier and more filling with some oats, eh? ;)

It's not necessary to mix 2 tablespoons of the flour with the blueberries, but it helps to make the blueberries stay whole while they bake. If you don't care about that, then by all means, just leave out that step.

I really do like these muffins. They're not too sweet and that cinnamon sugar topping totally hits the spot.


Blueberry Oatmeal Muffins
(makes 1 dozen muffins or about 35 baby muffins)

Ingredients:
  • 1 1/2 cups all purpose flour, divided
  • 3/4 cup rolled oats
  • 1/2 cup packed brown sugar
  • 2 tsps baking powder
  • 1/2 tsp baking soda
  • 1/4 tsp salt
  • 1 egg, beaten and at room temperature
  • 3/4 cup milk
  • 1/4 cup canola oil
  • 1/2 tsp vanilla extract
  • 1 cup fresh blueberries, rinsed and dried
  • 1 Tbsp sugar
  • 1 tsp ground cinnamon

Directions:
  1. Preheat oven to 400F. Line muffin tins with liners. Set aside.
  2. In a large bowl, combine all but 2 tablespoons of flour with the oats, brown sugar, baking powder, baking soda and salt. Mix well. Set aside.
  3. In a medium bowl or large measuring cup, combine beaten egg, milk, canola oil and vanilla extract. Mix well. 
  4. Pour liquids into the dry ingredients. Mix just until combined. Set aside.
  5. In a small bowl, toss blueberries in remaining 2 tablespoons of flour. Gently fold into the batter. Spoon batter into muffin tins to the top. 
  6. In another small bowl, combine the sugar and ground cinnamon. Top each muffin with some of the cinnamon sugar mixture.
  7. Bake in the center rack for 10-15 minutes (for mini muffins) or 20-25 minutes (for regular muffins), or until a cake tester comes out clean when poked inside the middle.
  8. Serve with (a pat of butter and) coffee.

Monday, July 21, 2014

Mom's Meat Sauce

Mom's Meat Sauce
Most people will probably think this is too sweet and it's sacrilege but it's a taste of childhood for my sibs and me. And man did we ever love our ketchup. This is definitely one way to have your kid have spaghetti and meat sauce if they love ketchup the way K does and the way my sis and I did as kids.

We used to have this as "sloppy joes" with buns, or with rice or with spaghetti (our fave way to eat it). I introduced this sauce to K last night and he had a healthy portion of it. Any way I can get him to have any meat, I'm happy. :)


Mom's Meat Sauce
(serves 4-5)

Ingredients:
  • 2 lbs lean ground beef
  • 1 10 3/4 oz (305g) can condensed tomato soup
  • 1/2 - 3/4 cup ketchup
  • 1/2 - 1 Tbsp sugar
  • Salt, to taste

Directions:
  1. Heat up a large pot (or in my mom's case, a wok) over medium high heat. When pot is hot, add beef and cook until no longer pink. Season with a pinch of salt.
  2. Once meat is cooked, stir in tomato soup, 1/2 cup of ketchup and a 1/2 tablespoon of sugar. Mix well until sauce is hot and bubbly. Taste and season with more ketchup, sugar and/or salt, if needed.
  3. Serve over spaghetti, rice or use as a "sloppy Joe" filling.

Friday, July 18, 2014

Coconut Tapioca Dessert Soup

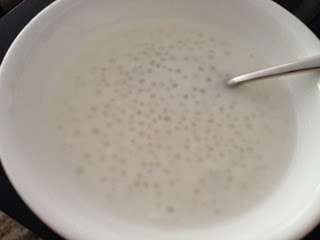
Coconut Tapioca Dessert SoupThis is one of Hubby's favorite desserts in the summer to have chilled. I love it too. Most people make this with taro root but we don't particularly care for it so I never put any in there; we just add more water. Hence my recipe does not call for it.

You can make it more coconutty by adding another can of coconut milk instead of as much water but we like it this way just fine.

Soaking the tapioca pearls is really optional. If you don't, then it'll just take longer to cook. The starch from the tapioca pearls will make the mixture like a jelly. It's really kind of cool.


Coconut Tapioca Dessert Soup
(serves 10-12)

Ingredients:
  • 8-10 cups water, divided plus more for soaking
  • 1 13.5oz can coconut milk
  • 1 cup tapioca pearls
  • 1 cup sugar
  • Ice (optional)

Directions:
  1. (Optional) In a small bowl, soak tapioca pearls in water for 30 minutes. Drain. 
  2. In a large pot, bring 6 cups of water to boil. Whisk in tapioca pearls. Keep whisking occassionally so they don't stick together and on the bottom of the pot. 
  3. Once the pearls are mostly translucent and you only see tiny white dots (about the size of a millimeter) in the middle of some pearls, add sugar and coconut milk.
  4. Bring to a gentle boil. Take off heat and let the pearls cook in the residual heat until pearls are completely translucent (I just leave the pot on the stove for a couple of hours while I nap or do something else). The mixture will thicken up as the pearls finish cooking.
  5. Stir in enough water/ice to thin out mixture to your liking. I ended up using another 2 cups of water and 3 cups of ice.
  6. Serve warm or chill in the fridge overnight (after the soup comes down to room temperature). 

Wednesday, July 16, 2014

Asian Beef Wrap

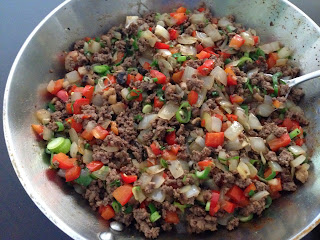
Asian Beef Wrap Filling
My sister does not eat onions, nor green onions. Surprisingly she ate this though. And she ate more than one wrap so she's gotta like this. I know I do, cuz I ate until I was stuffed. :P

You can wrap everything yourself and then serve it, or just place the skillet on the dinner table and have everyone make their own wraps. This is essentially what I did. It's more like a family meal this way.


Asian Beef Wrap
(serves 4-6)

Ingredients:
  • 8-12 10" flour tortillas
  • 1 head of green lettuce, leaves washed and dried
  • 1 lb lean ground beef
  • 1 bell pepper, diced
  • 1 medium onion, diced
  • 1 cup mushrooms, diced
  • 2 garlic cloves, minced
  • 2 green onion stalks, finely diced
  • 1 Tbsp soy sauce
  • 2 Tbsps oyster sauce
  • Salt & pepper, to taste
  • Hoisin sauce
  • Sriracha

Directions:
  1. Heat up a large skillet over medium high heat. When the skillet is very hot (a water droplet would bounce and sizzle away), add ground beef. Season with salt and pepper. Cook until beef is no longer pink.
  2. Toss in bell pepper, onion, and mushrooms. Cook until onions start getting soft.
  3. Add garlic and soy sauce. Cook until garlic is fragrant.
  4. Stir in oyster sauce and green onions. Turn off heat. Season with more salt and pepper, if necessary.
  5. To assemble, lay a thin layer of lettuce leaves on a tortilla. Spoon about 1/3 to 1/2 cup of beef mixture into the middle. Top with as much hoisin sauce and Sriracha as you like. Fold opposite ends and roll into a small/medium wrap. Repeat with remaining filling.
  6. Enjoy with a cold glass of limeade or strawberry lemonade.

Monday, July 14, 2014

Easy Mini Cinnamon Buns

Easy Mini Cinnamon Buns
These are probably the easiest cinnamon buns I've ever made. I like them mini, so I could finish one in 2-3 bites. You can always make them normal sized by not cutting the dough in half before rolling. :)

It's important to use pasteurized milk, otherwise the bacteria will likely kill the yeast. Although I wouldn't worry about it, since most milk is pasteurized these days.

Definitely eat these while they're hot. Otherwise I'd just nuke them in the microwave for about 5 seconds to warm them up if eaten after they've cooled down.


Easy Mini Cinnamon Buns
(serves 4-6)

Ingredients:
  • 2 1/4 tsps (or 1 packet) instant yeast
  • 1 cup whole milk
  • 1/2 cup (semi-)melted butter, divided
  • 1/4 tsp salt
  • 2 1/2 - 3 cups all purpose flour
  • 1 Tbsp ground cinnamon
  • 6 Tbsp sugars, divided
  • Canola oil, for greasing bowl
  • About 1 cup cream cheese frosting (1/4 of this recipe's frosting is good enough)

Directions:
  1. Heat up milk and 3 tablespoons of butter until the temperature reaches about 110F (the temperature of bath water/just a bit warmer than your body temperature), either in a small sauce pan over medium heat or in a 2 cup measuring cup in the microwave.
  2. Transfer butter and milk mixture to a large mixing bowl. Add yeast, 1 tablespoon of sugar and salt. Mix well.
  3. Add 2 cups of flour to the liquid mixture. Use the handle of a wooden spoon to mix dough until it gets sticky and a ball of dough starts to form. Roll it out onto a floured surface and knead, adding flour as needed, until the dough is just tacky and no longer sticky (usually about 2 1/2 of flour and 5 minutes of kneading will do). Form the dough into a ball. Grease the mixing bowl with canola oil and place the ball of dough in it, rolling it in the bowl to get it greased up.
  4. Cover with a damp tea towel and leave it in the microwave for 1 hour, or until the dough doubles in size. Do NOT turn on the microwave. It's the best place to let the dough rise.
  5. Line a 8" x 8" pan with parchment paper. Set aside.
  6. On a lightly floured surface, roll out the dough into a thin rectangle. Brush with 3 tablespoons of butter. Sprinkle 1/4 of sugar on top and then with the cinnamon. Use a knife or pastry cutter to cut the rectangle lengthwise (to make 2 long rectangles).
  7. Starting at one end, tightly roll up the dough and situate seam side down. Repeat with the other rectangle. Using the same knife or pastry cutter, cut the dough into 1 1/2 - 2 inch long pieces.
  8. Place the cinnamon buns into the parchment lined pan. Spread remaining butter over the tops of the cinnamon buns.
  9. Place the pan on top of the oven to rise while the oven preheats. Preheat to 350F. Bake in the middle rack for 25-30 minutes, or until slightly golden brown. While the cinnamon buns are baking, make your cream cheese frosting.
  10. Spread the frosting over the hot cinnamon buns. Let cool for a couple of minutes before serving with milk or coffee.

Friday, July 11, 2014

Tofu Kimchi Soup

Tofu Kimchi Soup
I've been meaning to make this for so long, but Hubby doesn't like kimchi, so it didn't make sense to make it when he was home. Luckily we have friends visiting and he's been out with them lots so I got to make foods that I like to eat without having to make separate meals for him; and this was one of those meals. WAHAHAHAH! :D


Tofu Kimchi Soup
(serves 4-6)

Ingredients:
  • 700g package smooth tofu, cut into bite size pieces, or sliced into 1/2" x 2" pieces
  • 3 cups kimchi, with juices
  • 3 cups mushrooms, sliced
  • 3/4 lb fish tofu/pork belly/pork shoulder
  • 3 cups water
  • 2 green onion, cut into 2 inch long pieces
  • 1 Tbsp gochujang
  • 1 Tbsp sugar

Directions:
  1. Heat up a large pot over medium high heat. Add kimchi, mushrooms, fish tofu/pork, water, gochujang and sugar. Mix well and bring to a boil. Boil, uncovered, for 30 minutes.
  2. Add tofu and green onion. Lower heat to medium low and cook for another 10 minutes. 
  3. Serve with rice and a fried egg (and other side dishes).

Wednesday, July 9, 2014

Baked Blueberry Cinnamon Croissant French Toast

Baked Blueberry Cinnamon Croissant French ToastI bought all these little micro croissants cuz I just really wanted some. I had a feeling I'd have leftovers and wouldn't know what to do with them and man was I right. Luckily I have some guests over so they can be guinea pigs for this dish. I had considered just making French toast out of them, but then decided to bake it so it'd be ready for everyone at the same time without needing to keep the earlier cooked ones in the oven.


Baked Blueberry Cinnamon Croissant French Toast
(serves 4)

Ingredients:
  • 14 micro croissants (or 4 large croissants)
  • 1 cup whole milk
  • 3 eggs, beaten
  • 1/4 cup sugar
  • 1 Tbsp vanilla extract
  • 1 tsp ground cinnamon
  • 1/4 tsp salt
  • 1/2 cup fresh blueberries

Directions:
  1. Place croissants in a 8" x 8" square glass pan, squishing them all in one layer. Set aside.
  2. In a medium mixing bowl, whisk together milk, eggs, sugar, vanilla extract, cinnamon and salt. Gently mix in blueberries.
  3. Pour mixture over croissants. Place a plate on top of the croissants and press down so that they're fully submerged in the custard. Chill in the fridge for 30-60 minutes.
  4. Preheat oven to 350F. Lift the plate off of the croissants and bake for 30-45 minutes, until golden brown and cooked through.
  5. Serve with maple syrup or whipped cream, etc. and coffee.
Monday, July 7, 2014

Danish Pancake Balls

Danish Pancake Balls
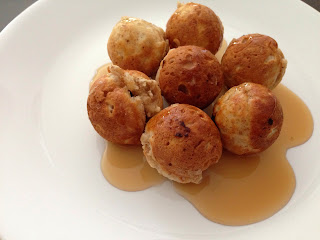
I just got myself a new takoyaki pan so I'm super happy. Although I'm all takoyaki'd out, I wanted to use it to make other foods. It just so happens that this pan is similar to the ones used for Danish pancake balls. So I decided to make some. :D

They turned out pretty good. Everyone loves them, so that's pretty darn awesome. I probably would've liked them more with whipped cream and fresh strawberries. But I didn't have any, so I just stuffed them with some chocolate chips and drenched them in maple syrup. :P


Danish Pancake Balls
(makes 60-64 balls)

Ingredients:
  • 2 cups all purpose flour
  • 1/2 cup whole wheat flour
  • 6 Tbsps sugar
  • 1/2 tsp ground cinnamon
  • 1/2 tsp salt
  • 2 eggs, beaten
  • 2 cups whole milk
  • 1/4 cup butter, melted
  • 1/2 cup semi sweet chocolate chips
  • Canola oil for greasing pan

Directions:
  1. Place an aebleskiver or takoyaki pan over medium-low heat. 
  2. In a large mixing bowl, whisk together flours, sugar, cinnamon and salt. Set aside.
  3. In a smaller bowl, mix together eggs, milk and butter. Whisk the wet ingredients into the dry until just combined. 
  4. When pan is hot enough to make a drop of water dance, brush holes with canola oil and fill each to slightly below the rim with batter. Drop a couple of chocolate chips in the center. Using knitting needles, picks, chopsticks, takoyaki picks, or your fingers, move some of the batter so that the chocolate chips are covered.
  5. Cook for another minute or so, until golden brown and you can use a skewer/takoyaki pick/chopstick to break the contact between the pancake ball and pan. Using the pick, turn/flip the pancake over to the other side, while stuffing the batter that overflows over the edges/from the turning ball into itself using another takoyaki pick (1 per hand!).
  6. Cook until golden brown, crispy on the outside and the pick comes out clean when pierced into the pancake ball. Transfer balls to a plate. Repeat with remaining batter, re-greasing the pan each time.
  7. Serve with maple syrup, powdered sugar, whipped cream, fresh fruits, etc. and coffee.

Friday, July 4, 2014

Takoyaki

Takoyaki
I LOVE these things. I will usually go to the Summer International Night Market just for these. Sure there are other foods, but there was always this one vendor who did these really awesomely. No one has ever done them as nice so I go less often. Maybe once a year now...

The other day I was totally craving these, so I decided to borrow a pan and make some. Now I have my own pan (yay!) so I'll make these another time. I overloaded myself last time so YEAH...Hubby and I can polish off a batch of this and we'd be stuffed (and I had made two batches...yikes!), so you probably can serve about 4-5 people as appetizers.


Takoyaki
(makes 24-30 balls)

Ingredients:
  • 2 cups dashi (I use instant and then cool it down to room temperature before using)
  • 2 eggs
  • 1 tsp soy sauce
  • 1/4 tsp salt
  • 1 1/4 cup all purpose flour
  • 2-3 green onions, finely chopped
  • 2 Tbsp pickled ginger, chopped
  • 180g cooked octopus or 7-8 baby octopus, cut into 1/2 inch cubes
  • Canola oil (for greasing pan)
  • Okonomi sauce
  • Japanese mayo
  • Bonito flakes/some sort of furikake
  • Dried seaweed flakes (optional)

Directions:
  1. In a small bowl, mix together dashi, eggs and soy sauce. Set aside.
  2. In a medium bowl, mix together flour and salt. Whisk in the wet contents from the small bowl until the batter is no longer clumpy.
  3. Heat your takoyaki pan over medium high heat. Using a napkin or a brush, generously grease the pan well. When the pan starts to smoke, carefully fill the holes in the pan with batter. 
  4. (If you need to do this in a couple of batches, then portion out your octopus, green onion and pickled ginger accordingly.) Drop a piece of octopus in the center of each hole. Sprinkle with green onion and and pickled ginger. 
  5. Lower heat to medium and cook for another minute or two, until golden brown and you can use a skewer/takoyaki pick/chopstick to break the contact between the takoyaki and pan. Using the pick, turn/flip the takoyaki over to the other side, while stuffing the batter that overflows over the edges/from the turning ball into itself using another takoyaki pick (1 per hand!).
  6. Cook until golden brown, crispy on the outside and they turn easily in their holes. Transfer balls to a plate. Repeat with remaining batter, if necessary.
  7. Drizzle okonomi sauce, then Japanese mayo, then bonito flakes/furikake and seaweed flakes (if using) over the takoyaki. Serve hot, but be careful because the inside is super hot.


Wednesday, July 2, 2014

Summertime Orzo

Summertime Orzo
I love orzo in the summer. I can stuff so much veggies in it and it'll taste refreshing. Even though I'm having pasta. WAHAHAHA.

This is a pretty awesome dish. A little goes a long way and you can serve it with any grilled protein or any pan fried fish fillet. We had it with pan fried halibut the other night. Darn yummy.


Summertime Orzo
(serves 4-6)

Ingredients:
  • 2 cups dry orzo
  • 1 cup snap peas, sliced on a bias
  • 1 bell pepper, finely diced
  • 2 cups mushrooms, sliced
  • 1 cup cherry tomatoes, halved
  • 1/2 medium onion, finely diced
  • 2 garlic cloves, minced
  • Salt & pepper, to taste
  • 1 Tbsp canola oil
  • Herb butter (optional)

Directions:
  1. Bring a medium pot of salted water to boil. Cook orzo until al dente. Drain.
  2. Heat up a skillet over medium high heat. Add oil. Once it's shimmery, add mushrooms and cook until they start getting some colour. Add onion, bell pepper and garlic. Cook for a minute or so until the onion starts to soften and garlic is fragrant.
  3. Toss in peas and tomatoes. Season with salt and pepper to taste.
  4. Mix in orzo until well combined. Add more salt and pepper if needed. 
  5. Serve with grilled protein and top with a pat of herb butter.

Monday, June 30, 2014

Sweet Crepes

Sweet Crepes
Nomnomnom. I love crepes. I'd get them when I go to the night market or something. But this one time, I had it and it was super greasy. It was gross so I was sad. The next day when I was trying to figure out what to make for breakfast, I decided to just try to make it for myself. Success! And SUPER easy. I can't even believe it.

The other day I made more cuz I had some leftover whipped cream, custard and strawberries in the fridge. I figure it was the perfect way to get rid of them. Although I still like filling them with Nutella and strawberries the most. Same with K. Just blogging this with him in my lap, he's pointing at the picture and asking for more. LOL.


Sweet Crepes
(serves 4)

Ingredients:
  • 1 cup all purpose flour
  • 1/4 tsp salt
  • 3 Tbsps sugar
  • 2 eggs, beaten
  • 3/4 cup + 2 Tbsps whole milk
  • 1/2 cup water
  • 3 Tbsps butter, melted
  • 1 tsp vanilla extract
  • Butter for greasing the pan
  • Filling options: Nutella, sliced strawberries, blueberries, custard, sliced bananas, whipped cream, melted chocolate, jam, etc.

Directions:
  1. In a medium mixing bowl, whisk together flour, salt and sugar. Whisk in eggs, milk, water, butter and vanilla extract until the batter is smooth.
  2. Heat up a nonstick pan over medium heat. Coat the pan with just a light layer or butter. Pour batter in the center of the pan and swirl to spread evenly. Once the edges get dry (about a minute or so, depending on your pan), flip and cook for another 15 seconds or so, until the other side is cooked. Transfer to a plate to cool/fill. Repeat until all the batter is gone.
  3. Spread filling on one side of the crepe, fold the non-filled side over the filled side and then fold in half again. Top with whipped cream and fresh fruit.

Friday, June 27, 2014

Angel Food Cake

Angel Food Cake
Teehee. Don't mind the plate. We had both sides of the family over for Father's Day dinner, so we just had dessert on paper plates.

I'm surprised the cake turned out so well. I can't bake for the life of me. I definitely will be using liquid egg whites next time I make this. Way easier than trying to figure out what to do with all those egg yolks. :O

The cake is pretty sweet, so I definitely recommend having some whipped cream and fruit to tone it down. Either that or coffee, but the whipped cream and fresh fruit is so much better. :D


Angel Food Cake
(serves 12-16)

Ingredients:
  • 1 1/2 cup egg whites
  • 1 1/4 cup cake flour (or 1 cup, minus 1 Tbsp all purpose flour)
  • 1 3/4 cup sugar
  • 1 tsp white vinegar
  • 1 tsp vanilla extract
  • 1/4 tsp salt

Directions:
  1. In a stand mixer, whip egg whites until stiff. Stir in vinegar and vanilla extract and whip until well incorporated. Set aside.
  2. In a medium bowl, sift together flour, sugar and salt. Gently fold flour mixture into the egg whites until just combined.
  3. Pour into an ungreased tube pan and place into a cold oven.
  4. Turn the oven on and bake at 325F for an hour or so until the top cracks and is golden brown. When a cake tester is inserted, it should come out clean.
  5. Take the cake out of the oven and invert the pan to cool. Once cooled completely, use a butter knife or metal spatula to scrape along the sides and the tube to loosen cake. Gently pop it out of the pan and place onto a cake stand or plate.
  6. Use a serrated knife to cut into the cake. Serve with fresh whipped cream and fresh fruit.

Wednesday, June 25, 2014

Three Cupish Chicken

Three Cupish Chicken
I think it's too oily when you use equal parts of sesame oil to wine and soy sauce. Using half as much oil is enough, and still gives tons of flavour.

I can see why they would've had so much oil back in the day though. Oh it is so luxurious...but too fatty. :P

I had this the day after in a bowl with some of the sauce over everything. It was way yummy. Total comfort food. Once my basil plant gets enough basil, I'm going to totally make this again.


Three Cupish Chicken
(serves 2-3)

Ingredients:
  • 6 chicken drumsticks or thighs or a combination of both
  • 1/2 cup dark soy sauce
  • 1/2 cup yellow wine
  • 1/4 cup sesame oil
  • 1 head of garlic, cloves peeled and separated
  • 5 ginger slices
  • 1 Tbsp sugar
  • 1 red chili pepper (optional)
  • A handful of Thai basil leaves

Directions:
  1. In a wok or clay pot, heat up sesame oil over medium high heat. When the sesame oil shimmers, add ginger, garlic and chili pepper (if using). Cook until fragrant.
  2. Gently lay chicken in a single layer in the wok or clay pot, skin side down. Brown both sides.
  3. Add sugar, soy sauce and wine. Mix well and bring to a boil. Lower the heat and simmer, partially covered, until chicken is cooked through, about 15 minutes. Turn the chicken every once in a while so that it will get dark on all the sides.
  4. Turn off heat and toss in basil leaves. 
  5. Serve with rice ad steamed veggies.

Wednesday, June 18, 2014

Saucy Sliced Beef with Peppers & Onions

Saucy Sliced Beef with Peppers & Onions
I feel like this is from a Chinese restaurant, only it's not nearly as unhealthy as the ones you'd eat at Chinese restaurants. Or maybe it is! I don't know. I just know that I didn't use that much oil. Lol.

I really liked this. It was hearty and yummy. Very homey feeling to it. My fave kind of food. ;)


Saucy Sliced Beef with Peppers & Onions
(serves 4-6)

Ingredients:
  • 1 lb flank steak, cut into stir fry strips (see note)
  • 2 medium bell peppers, chopped
  • 1 medium onion, chopped
  • 2 green onion stalks, chopped into 1 inch long pieces and/or diced
  • 1/3 cup water
  • 1/4 cup soy sauce
  • 2 Tbsps cornstarch, divided
  • 1 Tbsp Hoisin sauce
  • 1 Tbsp sugar
  • 2 garlic cloves, minced
  • 5 slices of ginger
  • 1 Tbsp canola oil
  • 1 tsp sesame oil

Directions:
  1. In a large bowl, mix 1 1/2 tablespoon of cornstarch with the beef. Let it sit for about 15 minutes.
  2. Heat a wok over high heat. Add canola oil and wait for it to shimmer. Add beef and let it start browning for a minute. Once the beef can be moved easily without ripping any meat, toss in ginger and garlic. Stir for a few seconds until garlic gets fragrant. 
  3. Stir in peppers, onions, Hoisin sauce, sugar and soy sauce. Cook for a few seconds while you make the slurry.
  4. In a small bowl, make a slurry out of the water and remaining cornstarch. Pour into the wok and mix well.
  5. Cover and let it cook until the peppers and onions are tender. Taste and adjust seasonings if necessary.
  6. Turn off heat. Mix in green onions and sesame oil.
  7. Serve with rice and soup.

Note: Cut the steak along the grain into 2 inch wide slabs. Then position the flank so that the grain is perpendicular to you. Using a sharp knife, cut against the grain on a bias (45 degrees) into strips that you'd see in Chinese restaurant stir fries.


Monday, June 16, 2014

Coconut Lime Quinoa

Coconut Lime Quinoa
This is very cool. It's pretty "rich" tasting, which is great since quinoa can sometimes taste so "healthy". This is really good with just some pan seared white fish or any seafood honestly. I've had it with pan seared cod and with some lemony garlic shrimp.

It's the perfect thing to have when you "can't" have carbs but need something rich that tastes like carbs. A little will go a long way. It's pretty darn filling...for Hubby and me anyway.


Coconut Lime Quinoa
(serves 6-8)

Ingredients:
  • 1 400ml can coconut milk
  • 2 cups quinoa, rinsed and drained
  • 1 1/2 cups chicken/vegetable stock (or water)
  • A pinch of salt
  • Juice of 1 lime
  • 1/4 cup cilantro, chopped

Directions:
  1. Combine everything except the cilantro into a medium pot. Cover and bring to a boil. Lower the heat and simmer for 15 minutes. After the 15 minutes, turn off heat and let it rest for 5-10 minutes.
  2. Add in cilantro and mix to fluff up.
  3. Serve with seafood, grilled chicken, etc.

Friday, June 13, 2014

Lemony Garlic Shrimp

Lemony Garlic Shrimp
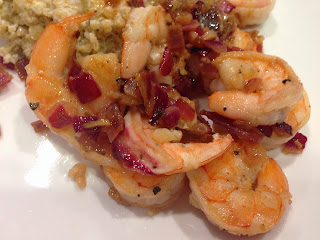
Uber simple and very lemony. It's good for when you make a rich starch or if you want to put it in a salad to add a warm component. Heck, or just have it as an appie or a snack! ;)


Lemony Garlic Shrimp
(serves 2)

Ingredients:
  • 1 lb raw shrimp, deveined and shelled
  • 1/2 small onion, finely diced
  • Juice of 1/3 of a lemon
  • 3 garlic cloves, minced
  • Salt & pepper, to taste
  • 1 Tbsp butter
  • 1 Tbsp olive oil

Directions:
  1. In a small mixing bowl, mix together garlic, shrimp, a pinch each of salt and pepper. Set aside for 5-10 minutes.
  2. Heat up a skillet over medium high heat. Add butter and olive oil. When butter and olive oil is heated, add onion and cook until just softened. Push the onions to the sides and add shrimp to the middle empty part of the skillet in one single layer.
  3. Once the shrimps start to curl, turn over to cook the other side for a few seconds until that side starts turning pink.
  4. Stir in lemon juice. Taste and add more salt and pepper, if necessary.
  5. Serve shrimp alone as an appetizer or over couscous, quinoa, pasta, in a salad, etc.

Wednesday, June 11, 2014

Ham Hash

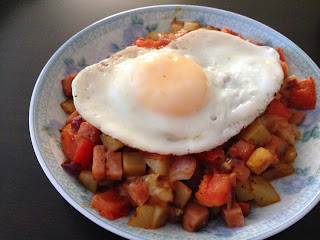
Ham Hash
I've been watching a lot of Chopped on the Food Network and noticed that a lot of times when contestants didn't know what to do with some leftover meat ingredient, they'd just make a hash. That got me thinking when I had leftover ham steak. So I guess watching TV does teach you stuff, eh? ;)

Sunny side up eggs always look best when you cook them properly. But sometimes I'm in a rush or just impatient so I'll use a lid to cover it when frying it so that it cooks quicker. You'll notice that if you do that, the yolk won't look as golden yellow as if you finish the cooking without a lid.


Ham Hash
(serves 2)

Ingredients:
  • 2 eggs
  • 2 small russet potatoes, diced
  • 1 small onion, diced
  • 2 roma tomatoes, diced
  • 1 cup ham, diced
  • 1 tsp Cajun seasoning
  • Salt & pepper, to taste
  • 1 Tbsps canola oil, divided

Directions:
  1. In a skillet, heat up 2 teaspoons of canola oil over medium high heat. Toss in potatoes and Cajon seasoning and cook until potatoes are browned and tender.
  2. Add in onions and ham. Cook until onions are soft and ham is heated through.
  3. Stir in tomatoes and use the liquid to deglaze the pan. Cook until tomatoes are soften. Season with salt and pepper. Transfer to two separate serving dishes.
  4. Wipe out the skillet and heat up the remaining teaspoon of canola oil over medium low heat. Fry up the eggs and season with salt when the eggs are about cooked. Top each dish of hash with a fried egg.
  5. Serve with coffee, milk or juice.

Monday, June 9, 2014

Sweet & Spicy Mango Chicken

Sweet & Spicy Mango Chicken
I've had mango chicken before, but it tasted a little weird. I'm not sure how I feel about mangoes with chicken. But this one was pretty good. It's more sweet and spicy than mango-y though. Maybe I just needed to add more? I DID add a lot of other stuff :P


Sweet & Spicy Mango Chicken
(serves 4-6)

Ingredients:
  • 1 mango, peeled, pitted and cut into 2 inch long strips
  • 2 bell peppers, thinly sliced
  • 1 small onion, thinly sliced
  • 4 slices ginger
  • 2 garlic cloves, minced
  • 2 boneless and skinless chicken breasts, cubed
  • Salt & pepper, to taste
  • 1 tsp cornstarch
  • 3 Tbsps Worcestershire sauce
  • 1/4 cup ketchup
  • 1 tsp sugar
  • 1 tsp Sriracha
  • 1 Tbsp soy sauce
  • 1 green onion, cut into 2 inch long strips
  • 1 Tbsp canola oil

Directions:
  1. In a small bowl, combine chicken with cornstarch and a pinch each of salt and pepper. Marinate for 10-15 minutes.
  2. Heat up a wok over high heat. Add canola oil. It should start shimmering. Add chicken breast.
  3. Once chicken starts turning opaque on one side, stir around. Add in ginger, garlic, peppers and onions. Toss around until the onions start to soften.
  4. Stir in mango strips, ketchup, sugar, Sriracha and soy sauce until everything is well coated in sauce. At this time, if you want your dish to be really saucy, add about 1/4 cup of water.
  5. Cover with a lid and cook until chicken is cooked through and veggies are tender crisp.
  6. Adjust seasonings if needed. Stir in green onions.
  7. Serve with rice and soup.

Friday, June 6, 2014

Preserved Lemons

Preserved Lemons
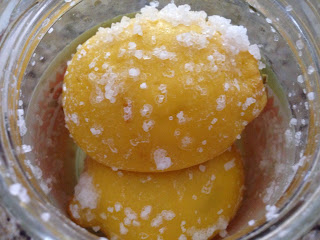
Lemons with salt cooling in the jar
Once in a while, I'll have too much junk and fried foods. So much so that I'll end up with a sore in my mouth. Usually from biting myself and it's worse when I haven't been sleeping well, but meh. This hurts like a B but putting a piece of preserved lemon on top of the sore helps.

Other times, I'll just mix it with some honey and ginger for a tea. It really does hit the spot when you're craving something sweet and salty yet refreshing. I know it sounds weird. Must be an Asian thing.

Steaming the lemons is optional. But it does get rid of that bitter taste so I recommend it.


Preserved Lemons

Ingredients:
  • Lemons
  • Kosher salt

Preserved Lemons - 1 Month Later
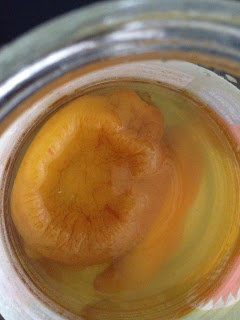
Lemons 1 month later
Directions:
  1. In a large pot, boil an inch of water with a steaming basket or steamer rack with a plate. When water has boiled, place lemons on plate or in the steamer basket. Steam lemons for 10 minutes. 
  2. After 10 minutes, transfer lemons in a wide mouth jar (do NOT pour any of the bitter lemon water from the plate into the jar). Cover with 1 cup of salt per 3 large lemons. Cool to room temperature. 
  3. Cover the jar with a lid and let lemons preserve for a month. 

Wednesday, June 4, 2014

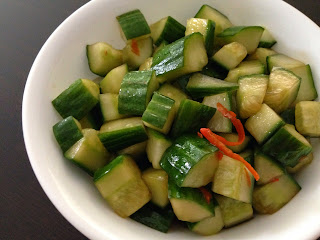
Spicy Cucumber Salad

Spicy Cucumber Salad
Cucumbers are awesome as a side in the summer when you're having some sort of Asian dinner with rice and some stir fries or whatever. It's refreshing and so good for you if you've had a lot of deep fried junk like how I normally do in the summers. :P


Spicy Cucumber Salad
(serves 2-4 as a side dish)

Ingredients:
  • 1 English cucumber, diced
  • 1/2 tsp garlic chili
  • 2 Tbsps white vinegar
  • 2 Tbsps soy sauce
  • 1 tsp sesame oil
  • Salt

Directions:
  1. Place the cucumbers into a small mixing bowl. Sprinkle with a pinch of salt and let it sit for 10 minutes. After 10 minutes, squeeze out as much of the cucumber juice as possible and return back to the bowl.
  2. Add garlic chili, vinegar, soy sauce and sesame oil. Toss until well coated.
  3. Let the cucumbers marinate in the sauce for 15 minutes before serving.
  4. Serve as a side with rice and another okazu, or alone.

Monday, June 2, 2014

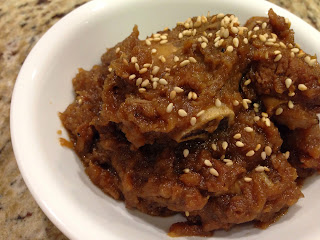
Korean Braised Beef Ribs

Korean Braised Beef Ribs
Maangchi is totally awesome. I essentially used her recipe to braise these ribs. I used back ribs instead of the short ribs, so then I just braised it longer. It's a little sweet if you eat it on its own with just rice, so I'd definitely make some side dishes to go with it.


Korean Braised Beef Ribs
(serves 4)

Ingredients:
  • 2 1/2 lbs beef back ribs, cut into 2 inch pieces (similar to giant pork spare ribs)
  • 2 Bosc pears, peeled & chopped
  • 1 medium onion, chopped
  • 8 garlic cloves
  • 1 inch knob of ginger
  • 1/4 cup soy sauce
  • 1 1/4 cup water
  • 1 Tbsp packed brown sugar
  • 1 tsp sesame oil
  • Sesame seeds (optional)

Directions:
  1. Fill a dutch oven or a large pot with 2 inches of water. Bring to a boil and blanch ribs for 5 minutes. Drain and rinse the ribs. Wipe down the dutch oven and add ribs. Set aside.
  2. In a food processor, add pear, onion, garlic, ginger, soy sauce, water and brown sugar and puree. Pour over ribs. Mix well and bring to a low boil. Cover the pot with a lid, but not completely; leave the lid ajar to let the steam out. Simmer for 2 hours, stirring occasionally.
  3. Uncover completely and turn heat up to medium high. Cook until almost all of the liquid is gone and the ribs are shiny, stirring  more often to prevent burning.
  4. Turn off heat. Stir in sesame oil. Transfer to a serving plate and sprinkle with sesame seeds.
  5. Serve with kimchi, rice and other side dishes.

Friday, May 30, 2014

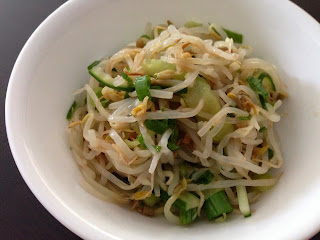
Bean Sprout Salad

Bean Sprout Salad
This is so simple yet it's so yummy to eat as a side with rice and some sort of protein (stir fry, stew, anything Asian, etc.).

K actually likes to eat it on its own. He uses his fingers to pick up everything. He's going through a phase where he likes to use his hands instead of a fork or spoon. OH WELL. Hopefully it'll end soon :P


Bean Sprout Salad
(serves 4-6 as a small side)

Ingredients:
  • 1 lb bean sprouts, rinsed
  • 1 English cucumber, sliced into matchsticks
  • 1 green onion, finely diced
  • 2 tsps sesame oil
  • 2 garlic cloves, minced
  • Salt
  • Sesame seeds (optional)

Directions:
  1. In a medium mixing bowl, toss cucumbers with a pinch of salt. Set aside for 5 minutes. 
  2. Meanwhile, bring a pot of water to boil. Blanch bean sprouts. Rinse under cold water and squeeze out as much water as possible. 
  3. Add bean sprouts to cucumbers. Mix in green onion, sesame oil and garlic. Taste and add more salt if needed.
  4. (Optional) top with sesame seeds. 
  5. Serve with rice and some sort of Asian okazu or alone.

Monday, May 26, 2014

Strawberry Lemonade

Strawberry Lemonade
I think I have found the perfect cocktail to make for parties/get-togethers/dinners, etc. This is so nice and refreshing. I know the Gin is optional, but you're totally missing out if you don't add it.

If you want to make it pretty, just add some lemon slices and strawberry halves.


Strawberry Lemonade
(makes one 2 liter pitcher)

Ingredients:
  • 2 cups strawberries, washed, hulled & halved
  • 1 cup lemon juice (~4-6 lemons)
  • 2 355ml Canada Dry Ginger Ale
  • 2 cups water, plus more
  • 3/4 cup sugar
  • Gin (optional)

Directions:
  1. In a small pot, heat up 2 cups of water with 3/4 cup of sugar over medium high heat. Once the mixture starts bubbling, turn the heat to low and continue simmering until the sugar has dissolved.
  2. In a 2 liter pitcher, combine strawberries and lemon juice. Using a hand/stick blender, puree strawberries with lemon juice until smooth. Slowly pour the ginger ale down the side of the pitcher to create as little bubbles as possible. There will be bubbles, but don't worry.
  3. Slowly add in the syrup you just made into the mixture. Stir in enough water to fill up the pitcher.
  4. Chill in the fridge for at least 3 hours before serving. The bubbles will settle after chilling in the fridge.
  5. To serve, combine 1-2 ounces of gin with 3/4 cup of strawberry lemonade, or drink on its own.

Friday, May 23, 2014

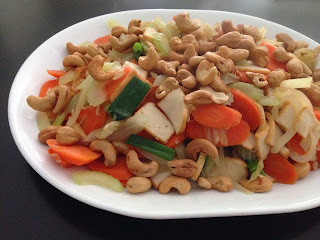
Fish Tofu & Veggies Stir Fry

Fish Tofu & Veggies Stir Fry
There's nothing quite like a simple stir fry to stretch your protein. In this case, it's a half pound of fish tofu. Okay, fine. So fish tofu doesn't really have that much protein, but still. It's protein-ish? Meh, you can always just sub the fish tofu with any protein. Chicken or pork slices are always my go to (marinated with soy sauce, sugar, cornstarch and oil). It's what I grew up with...but I think fish slices would go nicely too. Just gotta brown them, take them out and then add them back in at the end so that it's not overcooked.

To make this totally vegetarian, just add some marinated firm tofu and you're good to go. :D


Fish Tofu & Veggies Stir Fry
(serves 4-6)

Ingredients:
  • 1 cup toasted/roast cashews
  • 1/2 - 1 lb fish tofu, sliced (or 1 marinated chicken breast, sliced/1 package marinated tofu, cubed/ 1/2 - 1 lb marinated pork tenderloin, sliced; etc.)
  • 1 small onion, thinly sliced
  • 2 medium carrots, thinly sliced
  • 3 celery ribs, thinly sliced
  • 3-5 slices ginger
  • 3 garlic cloves
  • 1 green onion, cut into 2 inch long pieces, white parts separated from green parts
  • 1/2 tsp salt
  • 1/2 tsp sugar
  • 1 Tbsp soy sauce
  • 1 Tbsp canola oil

Directions:
  1. Heat up a wok over high heat. If your cashews aren't roasted, toast them in the dry wok and then set aside in a clean bowl.
  2. Add oil and let it heat up until the oil shimmers. Add in ginger, garlic and white parts of the green onion. Cook until fragrant.
  3. Add protein and cook until lightly browned.
  4. Toss in onions, carrots, celery, salt, sugar and soy sauce. Mix well. Cover and cook until protein is cooked through and veggies are tender crisp.
  5. Stir in green parts of the green onion. Transfer everything onto a serving dish. Top with toasted/roast cashews.
  6. Serve with rice and soup.

Wednesday, May 21, 2014

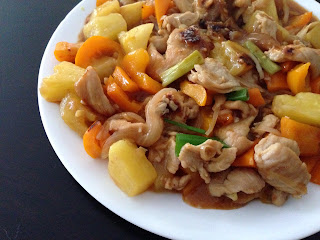
Sweet & Sour Chicken

Sweet & Sour Chicken
I don't know what's more toddler friendly than sweet and sour chicken. Honestly. It's sweet, it's tangy and it's saucy. God, I love this stuff. K just goes for the pineapples. He'll eat a couple of peppers, but then spit them out cuz he likes the pineapples more. It's almost impossible to get him to eat anything other than the pineapples if he feeds himself. Can't blame him. They are pretty darn sweet. Fresh all the way!


Sweet & Sour Chicken
(serves 4)

Ingredients:
  • 2 boneless skinless chicken breasts, thinly sliced
  • 1 medium bell pepper, chopped
  • 1 1/2-2 cups fresh pineapple chunks
  • 1 small onion, thinly sliced
  • 1/2 inch knob of ginger, minced
  • 2 garlic cloves, minced
  • 2 Tbsps cornstarch, divided
  • 1/4 cup soy sauce, divided
  • 1/2 cup water
  • 1/4 cup white vinegar
  • 4 tsps sugar, divided
  • 1/4 cup ketchup
  • 1 green onion stalk, cut into 1 inch pieces
  • 4 tsps canola oil, divided

Directions:
  1. In a medium mixing bowl, mix together 1 tablespoon of cornstarch, 2 tablespoons of soy sauce, 1 teaspoon of sugar, and 1 teaspoon of canola oil. Toss in chicken and marinate for 10-15 minutes.
  2. Heat up the wok over high heat. Add remaining canola oil. Once the oil shimmers, add chicken to cook in one layer. Once one side is browned, turn the chicken slices over to start cooking on the other side while you add ginger, garlic and onions. Stir the mixture and let it cook while you put the slurry together.
  3. In a small bowl, dissolve the remaining cornstarch in water, remaining soy sauce, and vinegar. Add to the mixture in the wok.
  4. Toss in bell peppers and pineapples. Add ketchup and the remaining sugar. Mix well. Cover and let it cook for a few minutes until the peppers are tender crisp and the chicken is cooked through.
  5. Taste and add more ketchup if needed. Toss in green onion.
  6. Serve with white rice and soup.

Monday, May 19, 2014

Chicken Florentine Penne Casserole

I have not made a chicken florentine in a LONG time. The last time I made it, I really loved it and swore I'd make it again. Well, I never did. It was just too much work. Lazy much? Totally. =\

Well, I'm totally craving the flavours again, so I made this concoction. I wasn't sure if there'd be enough milk to cook the pasta properly without drying out anything. OMG how happy was I when it came out perfectly. I gotta give credit to the mushrooms and spinach though. I'm sure they helped in it. :D

You can make this vegetarian or into a side dish by just not adding the chicken. Or you can sub with firm tofu.


Chicken Florentine Penne Casserole
(serves 6)

Ingredients:
  • 3 1/2 cups dry penne pasta
  • 2 boneless skinless chicken breasts, cubed
  • 1 300g frozen chopped spinach, defrosted and drained
  • 1 lb mushrooms, sliced
  • 2 1/4 cups whole milk
  • 2/3 cup Parmesan cheese, grated
  • 1 284ml can cream of mushroom soup
  • 1 Tbsp dry Italian seasoning
  • 1/2 tsp salt
  • 1/2 tsp black pepper
  • 1/3 cup butter, melted
  • 1 1/4 cup Panko breadcrumbs

Directions:
  1. Preheat the oven to 375F.
  2. In a large mixing bowl, mix together milk, cheese, mushroom soup, Italian seasoning, salt and pepper until the mixture is no longer clumpy. Mix in chicken breasts, penne, spinach and mushrooms. 
  3. Transfer mixture into a  2 1/2 quart casserole dish. Set aside.
  4. In a small bowl, mix melted butter and Panko breadcrumbs. Sprinkle on top of the casserole. Tightly cover the casserole with a greased aluminum foil.
  5. Bake for 45 minutes. Remove the aluminum foil and bake for another 10 minutes, uncovered, to crisp up the breadcrumbs.
  6. Serve with a light salad and/or soup.

Friday, May 16, 2014

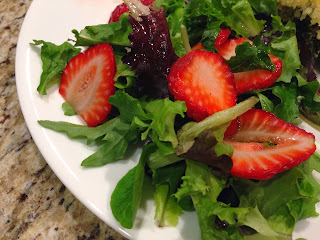
Lemony Strawberry Mixed Greens Salad

Lemony Strawberry Mixed Greens Salad I'm a sucker for buying the big bags of lemons at the grocery store. It's silly because I almost never use up all of them unless I'm making lemonade, which means I'll almost have to throw away a few. It's sad when I have to. I know I can do other things with it and one of those things is to make a lemony vinaigrette. It's the easiest way for me to use up anything citrus: to make a vinaigrette. Lol.

This vinaigrette can be used on any salad with strawberries and/or sweet greens. If not using on a salad with sweet ingredients, I'd add more honey.


Lemony Strawberry Mixed Greens Salad
(serves 6)

Ingredients:
  • Juice of 1 lemon
  • 1 Tbsp honey
  • A pinch each of salt and pepper
  • 1/4 cup garlic infused virgin olive oil
  • 150g mixed greens
  • 6-8 strawberries, sliced
  • 1/2 cup toasted almonds, walnuts or pecans (optional)

Directions:
  1. In a bowl, combine lemon juice, honey, salt and pepper. Drizzle in 2/3 of the olive oil while whisking vigorously. Taste and add more olive oil if the vinaigrette is too acidic.
  2. In a large salad bowl or mixing bowl, combine mixed greens, strawberries and pistachios. Drizzle dressing over greens and gently toss. 
  3. Serve with a creamy/rich entree.

Wednesday, May 14, 2014

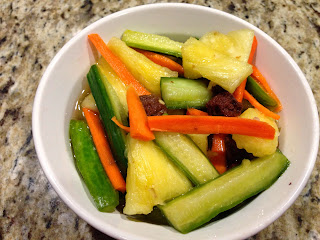
Pineapple Cucumber Salad

CRAZY simple. This is definitely one of my favorite summer dishes. I learned this from my mother in law. She makes it for every potluck event and I gobble as much of it down as I can without looking too much like a piggy. :)

Depending on the dried plums, you may need to add some vinegar or lime juice and sugar. There's this specific kind that my mother in law brings back from Malaysia that just makes this dish superb. I have no clue what the brand is, so I can't even Google it. She always brings it back in a clear bag. Like the ones you use for bulk foods....oh well!

As you can tell by the top picture, clearly, I forgot the carrots. But I do have a picture below that my MIL made just last weekend. :)


Pineapple Cucumber Salad
(serves 6-8)

Ingredients:
  • 1 small fresh pineapple, cubed (3-4 cups)
  • 1 cucumber, cut into 2 inch pieces or cubed
  • 1 medium carrot, julienned
  • 3 dried plums
  • Salt
  • 1/4 cup white vinegar
  • Sugar (optional)
  • 1 red chili pepper, finely diced (optional)

MIL's Pineapple Cucumber Salad
Directions:
  1. In a medium bowl, sprinkle two pinches of salt over the cucumbers and let it sit for 10-15 minutes. Rinse and place back into the mixing bowl.
  2. Add pineapple chunks, carrots, the dried plums, vinegar and chili pepper, if using. Mix well. 
  3. Chill in the fridge overnight before serving. 
  4. If the salad is too sour, add some sugar. If not sour enough, add more vinegar.
  5. Serve as a side to any (spicy) Asian dish or eat alone.

Monday, May 12, 2014

Sriracha Baked Chicken Breast

Sriracha Baked Chicken Breast
It sucks when I try something new and I like it but Hubby doesn't. This was the case for this chicken. I liked it cuz it's so easy and I can use it for salads, quesadillas, fajitas, burgers, etc. But Hubby did not like the taste of it. Boo...I guess I'll have to file this under the list of things I'll have to have when he's not around....unless I want to make a separate meal for him. >_>


Sriracha Baked Chicken Breast
(serves 2)

Ingredients:
  • 2 boneless, skinless chicken breasts
  • 2 tsps virgin olive oil
  • 2 tsps Sriracha
  • 1 /2 tsp allspice
  • Pinch each of salt & pepper
  • Juice of 1 lime

Directions:
  1. Preheat oven to 375F. Line a baking/roasting tray with parchment paper. Set aside.
  2. In a shallow dish (or even right on the baking/roasting tray), mix together oil, Sriracha, allspice, salt, pepper and lime juice. Place chicken into the dish/tray, flipping and rubbing to get chicken all coated with the mixture.
  3. If needed, transfer chicken to baking tray lined with the parchment paper and bake for 25-30 minutes, until chicken is cooked.
  4. Take chicken out of the oven and let rest for 5 minutes before slicing.
  5. Serve as is with rice and a salad, or use in salads, quesadilla, fajitas, burgers, etc.

Friday, May 9, 2014

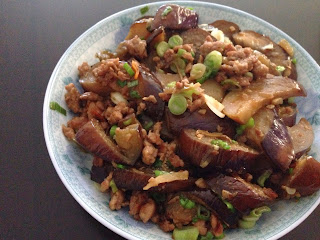
Stir Fry Eggplant with Minced Meat

Stir Fry Eggplant with Minced Meat
So I love eggplant when it's stir fried or deep fried. I just love it. Hubby can't stand it so I almost never have it unless we're out at a restaurant. This is probably only the second time I've bought eggplant to cook at home. I'm so glad I did. This was so yummy.

I made it spicy just cuz I'm just in love with this garlic chili that I bought on a whim from the grocery store a while back. If I don't have any chilies at home, I just use this. It's crazy spicy and SO GOOD. Probably cuz we love garlic so much in our household...I dare say that it's better than Sriracha for stir fries and that sort of thing. Anything that requires a dipping sauce or something like that, Sriracha is still king. ;)

Honestly, you can turn this into a vegetarian dish if you don't add the meat. It doesn't really matter whether you do it or not. I just don't like making too many different dishes at night (read: lazy) so I add the meat to ensure I get some protein. :P


Stir Fry Eggplant with Minced Meat
(serves 2)

Ingredients:
  • 1 medium Chinese eggplant (about 8-10 inches in length), cut in half lengthwise and then 1/2 inch half moons or into 2 inch long strips
  • 1/4 lb lean ground pork
  • 3 Tbsps soy sauce, divided
  • 3 tsps canola oil, divided
  • 2 tsps cornstarch, divided
  • 1 tsp sugar, divided
  • 2 garlic cloves, minced
  • 1/2 inch knob of ginger, cut into slivers
  • 1/2 cup water
  • 1 tsp oyster sauce
  • 1/4 tsp garlic chili
  • 1 green onion, finely diced

Directions:
  1. In a small bowl, marinate the pork with 1 tablespoon of soy sauce, 1 teaspoon of canola oil, 1 teaspoon of cornstarch and 1/2 teaspoon of sugar for about 15 minutes.
  2. Heat up remaining oil in a wok over medium high heat. Swirl it around so that all the sides are coated with a thin later of oil. Add marinated pork and cook until browned. Add in eggplant, garlic, ginger and cook until eggplant starts softening.
  3. Stir in oyster sauce, remaining sugar, remaining soy sauce and garlic chili. Toss until well coated.
  4. In a small bowl or cup, make a slurry out of the remaining cornstarch and water. Add to the wok and toss. Cover the wok and cook until eggplant is fully cooked.
  5. Turn off the heat and toss in green onions.
  6. Serve with rice.

Wednesday, May 7, 2014

Wonton Noodle Soup

Wonton Noodle Soup
A childhood classic for me is mom's wonton noodle soup. For a long time I couldn't figure out how she made the soup taste so good. It's really very simple, but I just put too much stuff in it. Then one day I got lazy and didn't put all that extra seasonings and then it tasted like the one mom makes. More salty though, since Hubby needs his salt. He's a funny one. His body craves salt, and he'll get sick if he doesn't get enough. Very cool.


Wonton Noodle Soup
(serves 2)

Ingredients:

Directions:
  1. In a large pot, bring about 2 inches of water to boil. Cook wonton noodles until al dente. Transfer to two deep soup noodle bowls. Add in the frozen wontons and stir for about half a minute to remove the flour. Drain wontons and rinse out the pot.
  2. Add about 5 cups of water back into the rinsed pot. Bring to a boil. Add season water with a pinch of salt and chicken bouillon. Once water has boiled, add wontons back into the pot and cook until wontons are cooked through (they'll float to the top). Add Maggi seasoning and taste soup. Add more salt if needed.
  3. Turn off heat, add a splash of soy sauce and stir in green onions. Ladle 8 wontons and soup per bowl over noodles.
  4. Serve hot.

Monday, May 5, 2014

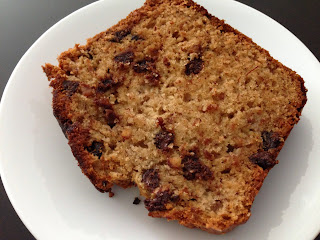
Peanut Butter Chocolate Banana Bread

Peanut Butter Chocolate Banana BreadRarely do we have bananas that are ripe enough for banana bread these days but it does happen once in a while. I've been craving peanut butter and/or wanting to put peanut butter in everything lately so I figured I'd put some peanut butter in the banana bread. And then of course I thought to put chocolate chips in it. I mean...how could you not? :P

K's daycare is a nut free environment. This means this is definitely not daycare friendly, so I'll have to help K finish this at home. The things a mother will do for her child, eh? ;)


Peanut Butter Chocolate Banana Bread
(makes 1 loaf)

Ingredients:
  • 1/2 cup butter, soften
  • 3/4 cup sugar
  • 1/2 cup all natural crunchy peanut butter
  • 2 medium bananas, sliced
  • 1 tsp vanilla extract
  • 2 eggs, room temperature
  • 1/2 cup sour cream
  • 1 3/4 cup all-purpose flour
  • 1 tsp baking soda
  • 1/2 tsp salt
  • 1/2 cup semisweet chocolate chips

Directions:
  1. Preheat oven to 350F. Line a 9" x 5" loaf pan with parchment paper, leaving some overhang. Set aside.
  2. In a stand mixer bowl or large bowl with hand mixer, cream butter, sugar and peanut butter until creamy until creamy.
  3. Mix in bananas, vanilla extract, eggs and sour cream until well combined. Use a spatula to scrape down the sides.
  4. In a medium bowl, combine flour, baking soda and salt. Add that and chocolate chips to banana and peanut butter mixture. Beat until everything is just combined.
  5. Pour batter into the loaf pan. Tap the pan on the counter a few times to knock any air out.
  6. Bake for 60 minutes, or until a toohpick inserted into the center of the loaf comes out clean. If the top becomes too brown, loosely cover with aluminum foil. Cool loaf in the pan for 10 minutes before removing to a wire rack to cool completely.
  7. Serve with coffee and/or a scoop of vanilla bean ice cream or milk, etc.

Friday, May 2, 2014

Easy Lo Mein

Lo MeinSo it has occurred to me that I've never posted a Lo Mein recipe here. WTF?!!??? It's one of those things that I like to make as a quick snack. Mind you, it almost always turns into a meal just by adding some veg and some leftover (roasted) meat.

My mom always made it super simple for us for breakfast. Just cooked hot oil with soy sauce. Believe me, it's worth it to heat up the oil. I remember sometimes she didn't have time to heat up the oil and it just never tasted the same. :(

But, of course, Hubby likes it with spice. Meh. I'll eat it whichever way. I love it all!


Easy Lo Mein
(serves 2)

Ingredients:
  • 2 bundles dry thin shrimp egg noodles
  • 3 Tbsps soy sauce
  • 1 tsp honey
  • 1 tsp canola oil
  • 1/2 tsp sesame oil
  • 1 red chili pepper, diced (optional)
  • 1 green onion stalk, finely diced (optional)

Directions:
  1. In a small pot, bring water to a boil. Add in the bundles of noodles. Cook for 5-7 minutes, or until al dente, using chopsticks or tongs to separate noodles from their bundled form.
  2. Meanwhile, mix remaining ingredients in a microwaveable bowl. Cover with saran wrap and cook on high for 20 seconds. Carefully uncover the bowl.
  3. Using tongs or chopsticks, transfer noodles into the bowl of sauce and mix. Some of the residual noodles water will help make the noodles saucier.

If you don't want to use the microwave, just mix all the ingredients, except for the noodles and oils. Heat up the oils in a wok or pot and then pour it over the sauce mixture and then mix in the noodles.


Wednesday, April 30, 2014

Wonton in Hot Chili Sauce

Wonton in Hot Chili Sauce
My mom makes the best wontons. Her filling is different all the time, depending on her mood and what's available at the moment, so I've taken to doing that as well. K only likes the wonton wrappers and Hubby likes it all meaty with some shrimp. I love them with shitake mushrooms and pork or pork and shrimp. Sometimes my mom will even put in some diced choy.

Hubby probably loves his wontons best this way rather than the traditional wonton noodle soup. I can't blame him. The man does love his spice.

There are so many ways to wrap a wonton. I've always wanted to wrap it the way my mom does it with her chopsticks, but I can't. I just end up smushing the thing into something totally unrecognizable. It's crazy awesome though. She just uses her chopsticks to put the filling in the middle of the wrapper, and then use it to help pinch the ends together to make it into a tiny meat pouch that looks so pretty too. It's similar to how this person does it.


Wonton in Hot Chili Sauce
(makes about 100 wontons)

Ingredients:
  • 2 lbs lean ground pork
  • 1 lb raw shrimp, finely diced (or 7 rehydrated shitake mushrooms, finely diced)
  • 1 Tbsp ginger, grated
  • 6 garlic cloves, minced and divided
  • 6 Tbsps soy sauce, divided
  • 1 Tbsp cornstarch
  • 4 tsps sugar, divided
  • 1 Tbsp soy sauce paste
  • 2 tsps canola oil
  • 2 tsps sesame oil
  • 1 tsp chili oil with some of the chili
  • 1 red chili pepper, finely diced (optional)
  • 1 green onion stalk, diced
  • 1 1/2 lb (about 100) wonton wrappers

Directions:
  1. In a large mixing bowl, combine together pork, shrimp/mushrooms, ginger, 4 cloves of minced garlic, 4 tablespoons of soy sauce, cornstarch, 3 teaspoons of sugar, canola oil and 2 teaspoons of sesame oil until mixed well.
  2. Line 2 large plates or baking sheets with wax paper. Set aside.
  3. To make the wontons, hold the wonton wrapper in your left hand so that it's diagonal (e.g., each corner pointing top, right, bottom & left). Spoon 1 teaspoon of filling into the middle of a wonton wrapper. Bring the bottom corner up to meet the top corner with your left thumb and middle finger. Then using both index fingers, push the left and right sides up, squeezing out all of the air from the pocket and lightly scrunch the top to make a neat little meat pouch. Lay the wonton down on the wax paper lined plate. Continue until you run out of either wrappers or filling.
  4. At this point, you can freeze all the dumplings for 2-3 hours before transferring them into bags for easier storage until you're ready to eat them.
  5. To cook, bring a pot of salted water to boil. Gently drop in 16 or so wontons into the pot of boiling water and cook for 8-12 minutes until wontons are cooked through. You'll know they're done because they'll float up to the surface.
  6. Meanwhile, make the sauce in a small microwaveable bowl by mixing together remaining soy sauce, remaining sugar, remaining minced garlic, remaining soy sauce, soy sauce paste, chili oil and red chili (if using). Cover with saran wrap and heat on high for 30 seconds. Uncover and mix in green onions.
  7. Using a slotted spoon or spider ladle, transfer cooked wonton to a shallow rimmed plate. Spoon sauce over wontons.
  8. Serve with tea.

Note: If you want to turn this into a meal, just use the salted boiling water after cooking the dumplings to cook some wonton noodles and then mix them into the remaining sauce after you've finished eating the wontons. Or mix the noodles in with the wonton and sauce to eat together.


Monday, April 28, 2014

Garlicky Celery

Garlicky CeleryYou know how if you go to Korean restaurants and order certain dishes, there'll be little side dishes to go with the meal? Apparently if you order some set meals from Taiwanese restaurants, you can sometimes get these small side dishes too.

One day I got this cold garlicky celery side dish with my beef curry and rice meal. It was very cool so I decided to so it at home. It's crazy easy and an easy way to add more veggies to a meal. I dare say that it's even an easy way to use up any uncooked Chinese veggies (aka choy) leftover. Although I'd probably cut up any choy into bite size pieces so I can just have it as a snack. :D


Garlicky Celery
(serves 2-3)

Ingredients:
  • 4 celery stalks, sliced into 1/8 of an inch thick pieces
  • 2 garlic cloves, minced
  • 1 tsp canola oil
  • Salt, to taste
  • Water (optional)

Directions:
  1. In a medium nonstick pan, heat up oil over medium high heat. Add in celery and cook for about a minute or until the celery starts softening a bit.
  2. Add in garlic and cook until garlic is fragrant and celery is tender crisp. Season with salt. Add a tablespoon of water if needed to prevent celery from browning.
  3. Serve hot as a side or chill in the fridge for an hour or so and serve cold as a side.

Friday, April 25, 2014

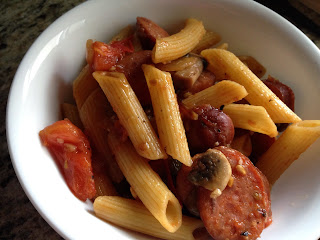
Smoked Sausage, Tomatoes & Mushrooms Penne

Smoked Sausage, Tomatoes & Mushrooms Penne
I haven't really wanted to cook pasta for a while. It's mainly cuz now I'm in this frame of mind where I feel like it's a chore to dirty another pot and strainer JUST to cook pasta and sometimes it takes longer for the pasta to cook than it does for me to make the sauce. Weird and probably very lazy, since it's almost the same as just making rice for any other dishes. HAH.

Regardless, I had the ingredients to make a pretty easy pasta dinner, so I made myself do it! I'm glad I did though. It was pretty good. :)

Surprisingly it wasn't that filling though. I ended up having to have some leftover lasagna as an "after dinner snack". Lol. Maybe I just needed to have a bigger portion. :P


Smoked Sausage, Tomatoes & Mushrooms Penne
(serves 4)

Ingredients:
  • 3 cups dry penne pasta
  • 1/2 lb mushrooms, sliced
  • 1 medium onion, diced
  • 3 smoked Italian sausages, sliced
  • 2 medium tomatoes, chopped
  • 1 red chili pepper, diced
  • 2 garlic cloves, minced
  • 1 Tbsp canola oil
  • 1/4 cup Parmesan cheese, grated
  • Salt & pepper, to taste

Directions:
  1. In a medium to large pot, cook pasta in boiling salted water until al dente.
  2. In a large skillet, heat up oil over medium high heat. Add in mushrooms and cook until they start to get some colour.
  3. Toss in onions, chili pepper and sausage. Cook until onions soften and sausage starts getting browned at the edges. 
  4. Add tomatoes and garlic. Use the tomato juice that secretes out to help scrape off any brown bits from the bottom of the pan. Season with salt and pepper.
  5. When pasta is cooked, drain, reserving 1/2 cup of pasta water.
  6. Toss in cooked pasta and stir in Parmesan cheese. If the pasta gets dry, add a little pasta water to loosen up.
  7. Serve with a side salad and soup.

Wednesday, April 23, 2014

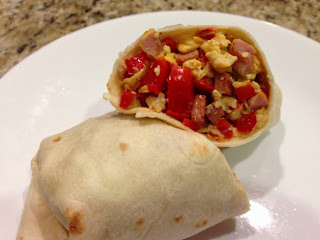
Quick Breakfast Wrap

Quick Breakfast Wrap
Believe it or not, this was easy enough for me to make during a weekday morning. I'm sure it's not THAT difficult to get yourself and a toddler ready in the morning and then cook breakfast and feed the pets at the same time. For most people. But I'm not most people. One of the most "elaborate" breakfasts I typically make on weekday mornings consist of sunny side up eggs with pre-cooked bacon that I can just nuke in the microwave. Teehee.

But this wasn't bad...I left the ham and peppers to cook on the pan while I took K to the potty (we're potty training and it's just oh so much fun) and luckily nothing burnt. YES!


Quick Breakfast Wrap
(serves 2)

Ingredients:
  • 2 10 inch flour tortillas
  • 3 eggs, beaten
  • 1 bell pepper, diced
  • 1 leftover ham steak, diced (or equivalent to about 1 cup of diced ham)
  • 2 green onion stalks, finely diced
  • Salt & pepper, to taste
  • 1 tsp canola oil
  • Salsa (optional)

Directions:
  1. Heat up oil in a pan over medium high heat. Add in ham and cook for about a minute so the sides start to brown up a bit. Toss in peppers and cook until peppers are tender crisp.
  2. Mix in beaten eggs and stir until eggs are almost no longer runny. Toss in green onions and season with salt and pepper. Take the pan off the stove.
  3. If you have a gas stove, just lay the tortilla over the gas and let it warm up the tortillas. It'll only take about 3-5 seconds per side, if even that, so keep an eye on those tortillas.
  4. When tortillas are warmed, lay them on two separate plates. Divide the filling in half, spooning half onto the center of each tortilla. Top with some salsa, if desired. Tuck in the ends and roll into a wrap.
  5. Serve with coffee or milk.
  6. If you're taking it to work with you, just use aluminum foil that's been lined with wax paper and wrap. It'll keep the wrap warm for about an hour or so.

Friday, April 18, 2014

Quick Cream of Chicken Soup

Quick Cream of Chicken Soup
Oh leftovers...They're usually pretty great. But when you have something like 3 tablespoons of chicken pie filling, it's hard to figure out what to do with it. I figure I'll just make a quick soup for Hubby. Weird as a breakfast item, but MEH! His throat was sore and I wanted to get rid of it. TEEHEE. :P


Quick Cream of Chicken Soup
(serves 1)

Ingredients:
  • 3 Tbsps or so of leftover chicken pie filling
  • 1 Tbsp all purpose flour
  • 1 Tbsp butter
  • 1 1/2 - 2 cups milk
  • Salt & pepper, to taste

Directions:
  1. In a small pot, melt butter over medium heat. Stir in flour until all the flour has been absorbed by the butter. Mix in leftover chicken pie filling and combine well.
  2. Slowly whisk in milk until the soup is a little more liquidy than you'd like. Heat through while stirring occasionally to prevent soup from sticking to the bottom of the pot.
  3. Season with salt and pepper. The soup will get thicker as it cools, so making it a little more liquidy than you'd like will usually yield the consistency that you like by the time it's cool enough to drink.
  4. Serve with toast.

Monday, April 14, 2014

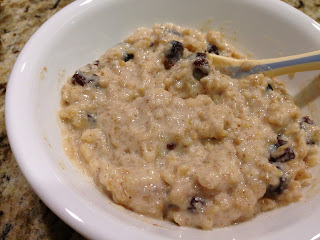
Creamy Cinnamon Raisin Oatmeal

Creamy Cinnamon Raisin Oatmeal
I haven't made any oatmeal for K for a while. He used to have it every day for 4 months or so when he first started eating. But now I make it for him way less. He just gets sick of the same foods so easily. He won't eat the same thing more than 3 days a week. And don't even try giving him the same thing more than once a day! Unless it's cookies and fruit. Those, he can eat 24/7 if we let him.

The kid loves raisins and we're running low on frozen blueberries (which he loves to put in his yogurt and oatmeal), so I thought I'd just make him cinnamon raisin oatmeal. Why not? They make cookies out of this stuff! ;)


Creamy Cinnamon Raisin Oatmeal
(serves 3 adults)

Ingredients:
  • 1 cup quick cooking oats
  • 3 cups whole milk
  • 1 small pinch salt
  • 1 cup raisins
  • 1-2 Tbsps brown sugar
  • 2 tsps ground cinnamon

Directions:
  1. Bring milk to a gentle boil in a pot over medium heat. Add in remaining ingredients. Turn heat to medium low and cook until oatmeal is thick and creamy, about 10 minutes. Stir occasionally with a spatula to prevent oatmeal from sticking to the pot.
  2. Serve with fresh fruit.

Friday, April 11, 2014

Omuraisu (Fried Rice Omelette)

Omuraisu (Fried Rice Omelette)
I've always seen this in Japanese and sometimes Korean restaurants, but never thought to try it. Honestly, it doesn't seem that interesting to me. But I do love having ketchup with my fried eggs, so why not? It's also an excellent use of leftover or fresh fried rice. I think having it with Kimchi Fried Rice is the best though. ;)

Rolling the omelette off the pan and onto a plate can be kind of tricky with such a thin omelette. You can always use more oil to help it out. Or, just make a dome out of the rice and then cover the dome with the circular egg and top with the ketchup. The presentation will be different, but it's all the same in the end. :)


Omuraisu (Fried Rice Omelette)
(serves 2)

Ingredients:
  • 2 eggs, beaten & divided
  • 2-4 Tbsps ketchup
  • 2 cups fried rice
  • 1 Tbsp canola oil, divided
  • Salt & pepper, to taste

Directions:
  1. Heat up fried rice, if necessary, by adding 1 teaspoon of oil to a small hot skillet over medium heat and stir frying until heated through. Transfer to bowl and wipe down the skillet.
  2. Return skillet to the heat and add another 1 teaspoon of oil. Let it warm up a bit over medium low heat before adding 1 of the beaten eggs in. Tilt the skillet to ensure egg is evenly distributed in the pan to make a very thin omelette. Season with salt and pepper. Add 1 cup of rice in the middle of the omelette. Fold one of the sides over to partially cover the rice. Gently roll the omelette over (the half with the rice onto the non-wrapped part) and off the pan and onto the plate to make a rolled omelette. Top with half of the ketchup.
  3. Repeat the process with the next omelette.
  4. Serve hot with soup or coffee.


Wednesday, April 9, 2014

Smoked Sausage & Peppers

Smoked Sausage & Peppers
I really love smoked sausages. Probably cuz I love hot dogs...but I didn't feel like heating it up with some jar pasta sauce with pasta.

I actually wanted to have some rice. I haven't really had white rice with a side dish for a while and I was totally going through withdrawal. That being said, I just made this quick sausage and peppers to go with my rice. I could've just had canned fried dace with black bean sauce (drool) or pan fried spam (more drool) but Hubby doesn't like either one, so I had to make real food. (K already had steamed egg to go with his rice, so I didn't really have to worry about him.)

Smoked Sausage & Peppers
(serves 3)

Ingredients:
  • 3 links smoked Italian sausage, sliced into 1/2 inch pieces
  • 2 bell peppers, any colour, cut into strips
  • 1 medium onion
  • 2 garlic cloves, minced
  • Salt & pepper, to taste
  • 1 Tbsp extra virgin olive oil

Directions:
  1. Heat up a large skillet with the extra virgin olive oil over medium high heat. Toss in smoked sausages and cook until the edges start to brown.
  2. Add in onions, peppers and garlic. Cook until sausages are browned, onions and peppers are fork tender, stirring occasionally. Season with salt and pepper.
  3. Serve over rice or with plain pasta coated with extra virgin olive oil.