Pages

Monday, April 29, 2013

Pork Belly Claypot Rice

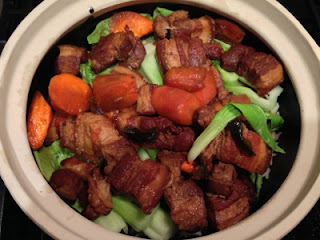
Pork Belly Claypot RiceIt's kind of deceiving since you're supposed to (I think) cook everything in the Claypot but I made the pork belly first and THEN cooked rice in the Claypot with the cooked pork belly, some of the sauce and veggies. Doesn't the pic just look AWESOME? Lol


Pork Belly Claypot Rice
(Serves 2-3)

Ingredients:
  • 3 cups ready made braised pork belly
  • 1/2 cup reserved braised pork belly sauce
  • 1 cup uncooked Jasmine rice
  • 1 1/2 cups water
  • 4 stalks Shanghai Bok Choy, quartered
  • 1 green onion, finely diced (optional)

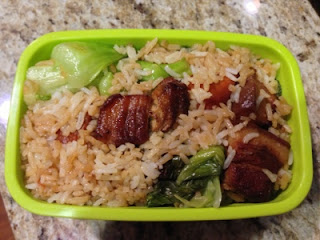
Pork Belly Claypot Rice Lunch Box
Directions:
  1. Wash rice a couple of times in cold water until the water runs clear(ish).
  2. Put rice and water into a large Claypot. Bring to a boil and then lower heat and simmer for 10 minutes.
  3. Uncover and quickly put in the Bok Choy on top of the rice and top with pork belly and the sauce. Cover and simmer for another 10 minutes.
  4. Turn off heat and let stand COVERED for another 15 minutes before serving.
  5. Mix everything together and then serve in bowls. Garnish with green onion (optional) and enjoy!

You can always drizzle more sauce over the rice before eating. It's so good!!!!! So very decadent. You might need a little more pork belly though with all that rice. Or you can just lessen the rice. I love rice, so it was good for me. But normally people like to eat more of the pork belly like my Hubby so then more pork belly or less rice would be a good idea.

Wednesday, April 24, 2013

Caesar Salad Dressing & Homemade Garlicky Croutons

Caesar Salad with Homemade Garlicky CroutonsApparently this dressing brings all the boys to the yard. Haha. I just had to try it. It's a family recipe. My sister's soon to be mom in law's recipe. I'm glad she's one of those people who share all her recipes. Cuz this was yummy. Even Hubby likes it and the only Caesars he likes are the alcoholic kind. Definitely not the salad type. Which I adore.

The dressing is even better after it's been sitting in the fridge for at least 15 minutes. So it's perfect to make ahead. :)


Caesar Salad Dressing
(Makes 1/2 cup)

Ingredients:
  • 1/4 + 1 Tbsp mayonnaise
  • 1/4 + 2 Tbsp extra virgin olive oil
  • 2 Tbsp lime juice
  • 5 garlic cloves, minced
  • 1/2 tsp Worcestershire sauce
  • Salt & freshly ground black pepper, to taste

Directions:
  1. Combine mayonnaise and olive oil in a mason jar. Cap and shake well until smooth.
  2. Add remaining ingredients. Cap and shake until well blended. Add more salt and pepper if needed.


Homemade Garlicky Croutons
(Makes 2 cups)

Ingredients:
  • 4 slices of whole wheat bread, cubed
  • 2 Tbsp garlic salt
  • 2 Tbsp extra virgin olive oil

Directions:
  1. Preheat oven to 350F.
  2. Combine everything in a large bowl and toss until cubed bread is thoroughly coated.
  3. Spread in one layer on a parchment lined baking tray. Bake for 10-15 minutes or until lightly toasted. If using a toaster oven, just put tray in and start toasting on level 4 on the bottom rack.

I like to have everything bite sized, so I always cut my romaine lettuce into bite size pieces or as close to it as possible without it looking like small little dices. Add as much or as little dressing and croutons as you'd like. I don't particularly care whether there's Parmesan cheese or not in my salad so I don't bother. Bacon is always nice but I like my salad simple. Maybe I'll add an egg or grilled chicken or salmon or something for protein but that'll have to be next time. :)


Monday, April 22, 2013

Quick Congee for Sickies

Quick Congee for SickiesK isn't feeling well :(

I hate when he's not feeling 100%. The mommy guilt is at an all time high whenever that happens. I should be at home taking care of my baby but mommy has to work. To help put food on the table. It blows. And then there's the "oh if only I made those special soups for him everyday like mom did for us then he'd have a better immune system and wouldn't get sick". But I'm too tired and drained from work to do it everyday. I dunno how single moms do it seriously. Hubby is great and helps out so much but it's still so much taking care of K. Kudos to all you moms out there.

Anywho, K is sick so I made some plain congee for him in the morning before I left for work. I cheated and ground up the rice before cooking it so it would cook at a fraction of the time it normally does. Thank god cuz it normally takes hours to get it to the consistency where he wouldn't spit it all out.

Portion size is for an adult. K is sick but still eating lots. He gets that from my dad lol. Silly guy. :)


Quick Congee for Sickies
(serves 1)

Ingredients:
  • 1/4 cup uncooked Jasmine rice
  • 1 inch knob of ginger
  • 2 cups pork stock
  • 1/2 cup cooked pork tenderloin, shredded
  • 1 green onion, finely diced
  • Salt, to taste

Directions:
  1. Rinse rice a couple of times and then grind it in a small blender, or spice grinder. It will be like a white paste. Add to a small pot. Use some of the stock to swish out the rest of the rice. Pour in the remaining stock and stir in the tenderloin & ginger. Partially cover and bring to a low simmer. Simmer on the lowest heat for 30 minutes for a thin congee or 45 minutes for a thicker congee.
  2. Stir in green onions and season with salt to taste. Make sure you remove the ginger before serving.

The trick to making congee not stick to the bottom of the pot is to not move anything in the pot after the rice is put in and liquid is heating up and to make sure you're using the lowest heat possible to avoid any burning. If you move the rice once it's been heated, then you'll have to stir it very often while it's cooking to keep the bottom from sticking.

Honestly, you can use any broth. You can even just use water but that's really REALLY bland. Although it's fine if you add a bunch of other ingredients in there...like preserved duck egg and salted minced pork. Now THAT'S the stuff (even though it's so not for sick people). ;)


Wednesday, April 17, 2013

Organic Unsweetened Silky Tofu Pudding

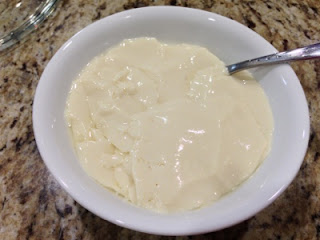
Organic Unsweetened Silky Tofu PuddingI love tofu pudding but I'm kind of sick of driving an hour out of my way to get any decent one. And the place where I usually get it from has increased their prices significantly! I can't really blame them. They have to find ways to survive while everything's prices around here goes up. But still.....I'm just cheap. Lol.

I read that you can use sweetened soy milk for this recipe too. However, you have to make sure that the only ingredients are soybeans, water and sugar. Otherwise it won't work (or so I've been told). Since I'm going to sweeten everything up with that yummy ginger syrup anyway, I just made the unsweetened version.

Of course you can always use the non-organic soy milk but it's significantly silkier in texture when you use organic. In fact, it's so awesome that I don't even need the syrup. No lies! :O

The gypsum powder may be hard to find. Just look in the Asian supermarkets. They come in little pouches, like the kind you'd find for rice flour. Or on Amazon. :P


Organic Unsweetened Silky Tofu Pudding
(serves 6-8)

Ingredients:
  • 8 cups unsweetened organic soy milk
  • 2 tsp gypsum powder
  • 2 tsp cornstarch
  • 1/4 cup water

Directions:
  1. Bring soy milk to a vigorous boil in a large pot. Watch the pot because the milk will quickly boil over once it starts boiling.
  2. In a separate large pot or casserole dish you'll be serving the pudding in, mix the gypsum powder and cornstarch with the water until well dissolved.
  3. Once soy milk boils vigorously, pour it into the powder mixture. Cover with a tea towel (to absorb moisture) and then with the pot/casserole dish lid. Let sit undisturbed for 30-60 minutes.
  4. Tofu pudding can be served warm or cold. Scoop with a shallow spoon or ladle into bowls and serve with ginger syrup, brown sugar, honey, simple syrup, black sesame paste, coconut milk, or any other sweetened topping.
  5. Refrigerate unused portion for up to 2 weeks, if it lasts that long.


Ginger Syrup
(makes approximately 1 cup)

Ingredients:
  • 1 1/2 cups water
  • 1 knob of smashed ginger (2 inches)
  • 1/4 cup sugar

Directions:
  1. Combine cold water and smashed ginger into a small pot. Bring to a boil and simmer for 10 minutes.
  2. Stir in sugar until dissolved.
  3. Remove from heat and cool to room temperature before using. Refrigerate unused syrup for up to a month.

Monday, April 15, 2013

Quick Kimchi

Chilled Quick Kimchi In a JarMaangchi is definitely my go-to blog for whenever I want to make any Korean foods. Kimchi is always at home. I love the stuff and it goes with almost every Asian food as a nice side dish. Traditionally it'll take forever but I'm lazy so I use her emergency recipe to save time. It tastes awesome. 
I changed a few things to make it my own though. I use napa cabbage instead of kind used in coleslaw. And I use more garlic. And a little more green onions and grate the carrots instead of julienne. Lol. It's still the main base though!


Quick Kimchi
(makes 3 1/2 cups)

Ingredients:
  • 1 large napa cabbage (approximately 2lb), washed and cut into bite size pieces
  • 1/4 cup Kosher salt
  • 1 cup water
  • 1/3 cup hot pepper flakes
  • 1/3 cup fish sauce
  • 2 Tbsp sugar
  • 1 garlic head, minced
  • 1 bunch green onions, cut into 1 inch length strips
  • 1 medium carrot, grated

Quick KimchiDirections:
  1. Place cabbage in a large mixing bowl. Cover with salt and water. Set aside and let sit for 15 minutes or so while you prepare the paste.
  2. In another large mixing bowl, mix remaining ingredients until blended to make a paste. Set aside.
  3. Rinse cabbage a couple of times under cold water to remove all the salt water.
  4. Add rinsed cabbage to the paste. Mix thoroughly before putting into a container. Press down on the kimchi to remove as much air in between the cabbage as possible. Seal and place in fridge until needed.

If you serve it immediately, it'll be pretty spicy. If you wait, then it'll be more fermented. If it's too fermented for your taste (say after a couple of months, if it lasts that long), then you can add a little sugar to it to stave off that sour/fermented taste. The juice is AWESOME in kimchi soups. ;)


Wednesday, April 10, 2013

Greek Yogurt Soufflé

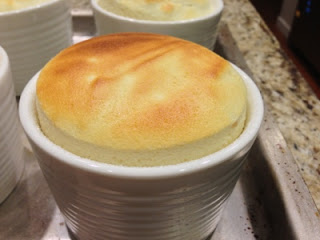
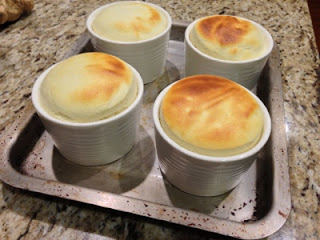
Greek Yogurt Soufflé on Baking Sheet (Closeup)Seriously, I should've used 8 shorter ramekins because the middle was a little underdone. BUT, I was greedy and wanted to fill these things up. HEEHEE. No matter. Next time I'll do that or find a way to bake them all the way through without burning the tops. Below is the recipe using 8 4oz ramekins instead of 4 8oz ramekins. :P


Greek Yogurt Soufflé
(serves 8)

Ingredients:
  • 1 cup Greek yogurt
  • 3 eggs, separated
  • 1/3 cup + 2 Tbsp sugar (plus more for dusting ramekins
  • 3 Tbsp all purpose flour
  • 1 tsp vanilla
  • 1/8 tsp salt
  • 1/8 tsp cream of tartar

Greek Yogurt Soufflé on Baking Sheet
Directions:
  1. Preheat oven to 375F.
  2. Grease eight 4oz ramekins with butter and sprinkle a little sugar inside each – like flouring a cake pan. Set on a baking sheet and set aside.
  3. In a large bowl whisk the yogurt with the egg yolks, 1/3 cup of sugar, flour, vanilla, and salt until smooth. Set aside.
  4. In another bowl beat the egg whites and cream of tartar with an electric mixer until foamy. Add in the remaining 2 tablespoons of sugar and continue beating until very stiff peaks form.
  5. Carefully fold the whites into the yogurt mixture until no puffs remain.
  6. Divide among the ramekins and bake for 15 minutes or until just golden and set.
  7. Serve immediately or it'll fall and become dense (kind of like a healthier cheesecake).

Monday, April 8, 2013

Carrot Cupcakes with Cream Cheese Frosting

Carrot Cupcakes with Cream Cheese FrostingCarrot cake is healthy right? I mean, it's got carrot in it, so it has to be healthy right? Lol.

Trying to eat healthy is hard. But I figure making carrot cupcakes wouldn't be so bad. That way it's more portion controlled. Especially if I make the cream cheese frosting more liquidy, so then I'm less likely to pile it on. Good plan, yes? I'd like to think so. Plus I just found this awesome recipe that I wanted to try. I lessened the sugar a bit and it was perfect.


Carrot Cupcakes
(makes 24 cupcakes)

Ingredients:
  • 2 cups all purpose flour
  • 2 tsp baking soda
  • 1 tsp salt
  • 2 tsp ground cinnamon
  • 1/2 tsp ground nutmeg
  • 1 tsp ground ginger
  • 1 3/4 cups sugar
  • 1 1/4 cups canola oil
  • 4 large eggs
  • 3 cups peeled carrots, grated

Directions:
  1. Preheat oven to 350F.
  2. Line 24 cupcake molds with papers, or butter and flour them.
  3. In a medium bowl, whisk flour, baking soda, salt, cinnamon, nutmeg and ginger to blend. Set aside.
  4. In a large bowl, whisk sugar and oil in large bowl until well blended. Whisk in eggs 1 at a time.
  5. Add flour mixture and stir until blended. Stir in carrots.
  6. Divide batter among cupcake molds, filling 3/4 of each.
  7. Bake cupcakes 14 to 18 minutes, or until a tester inserted into the center of one comes out clean.
  8. Let cool in pans for 5 minutes or so, then transfer cakes to a cooling rack. Let cool completely before frosting them.


Close Up of Carrot Cupcake with Cream Cheese FrostingCream Cheese Frosting
(makes 3 cups of frosting)

Ingredients:
  • 2 8oz packages of cream cheese, softened
  • 1/2 cup butter, room temperature
  • 1 tsp vanilla
  • 2 cups icing sugar
  • 2 Tbsp milk (optional)

Directions:
  1. In a medium bowl, cream together the cream cheese and butter until creamy. 
  2. Mix in the vanilla, then gradually stir in the confectioners' sugar. Add milk and blend well to thin out if you want a thinner frosting.
  3. Store in the refrigerator after use.

Friday, April 5, 2013

Cantonese Braised Brisket with Daikon

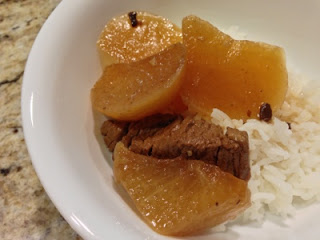
Cantonese Braised Brisket with DaikonLook at that sad little brisket sitting in the bowl surrounded by daikon (Chinese turnip) and rice. Most people like the brisket the most, but I actually prefer the daikon. It's been simmering in a super flavourful broth for 3 hours, soaking in all that yummy flavourful goodness. How can it NOT be yummy????? You're right, cuz it can't not be! Lol. Luckily, Hubby likes the meat more and I like the daikon more, so I eat the daikon with a bit of brisket and he eats most of the brisket with just a bit of daikon. :)

You can get daikons at any Asian supermarket. They're usually about the length of your forearm and just as thick. They're the perfect root veggie to soak up any broth. But it does take a long time for them to get tender. It's well worth it though because of how much flavour the veggie soaks up. Totally AMAZING, assuming the broth is super yummy, but why wouldn't it be? ;)


Cantonese Braised Brisket with Daikon
(serves 4)

Ingredients:
  • 2 lb beef brisket, cut into 1 inch cubes
  • 1 daikon, cut into chunks or 1/2 inch thick slices
  • 2 star anise
  • 1/4 cup shaoxing wine
  • 1/4 cup soy sauce
  • 2 Tbsp black bean garlic sauce
  • 2-3 inch knob ginger, smashed
  • 1 piece dried tangerine or orange peel
  • 1 inch rock sugar
  • Water
  • 2-4 Tbsps oyster sauce
  • 2 Tbsp canola oil

Directions:
  1. Heat a wok on high heat. Add star anise, ginger, and dried tangerine or orange peel. Stir until fragrant. Add all of the brisket and stir occasionally until all sides are browned.
  2. Add black bean garlic sauce and turnip. Sauté for a couple of minutes.
  3. Stir in shaoxing wine, soy sauce, rock sugar. 
  4. Transfer everything to a large pot or Dutch oven. Pour in water until everything is 3/4 of the way covered and add rock sugar. Bring to a gentle boil. Lower heat and simmer, covered, on the lowest heat for 3 hours, or until fork tender.
  5. Stir in oyster sauce and add more soy sauce, as needed.
  6. Serve over rice.

The rock sugar helps to tenderize the meat. I'd try not to use too big of a piece or it'll make the broth pretty darn sweet cuz the daikon is already pretty sweet.


Wednesday, April 3, 2013

Omelette Pie

Whole Omelette PieNot much to say. I got the idea from here and added to it. But I forgot to add cheese. Whoops. Like I said before, I really need to be more organized and get my mise en place all ready before I start cooking/assembling things. It still tasted awesome. Hubby thinks cheese really rounds it out though, so I'll have to remember it next time.

I'm sorry, but I just can't make it look as pretty as it was from the original recipe. Did I say that I was also in a rush? And I'm just not that artsy. Very homey indeed, right? Lol. Oh man...


Omelette Pie
(serves 4)

Ingredients:
  • 1 can crescent rolls
  • 4 large eggs, light beaten
  • 1 red bell pepper, diced
  • 1/2 cup white mushrooms, sliced
  • 2 Tbsp bacon grease or extra virgin olive oil, divided
  • 1/2 cup homemade bacon bits (so easy and tastes way better)
  • 1/2 cup cheddar cheese, shredded
  • Salt & freshly ground pepper, to taste

Omelette Pie Slice
Directions:
  1. Preheat oven to 375F.
  2. In a large frying pan, sauté mushrooms and bell pepper in 1 Tbsp of bacon grease or extra virgin olive oil. Season with salt and pepper. Scoop out and set aside.
  3. Heat the remaining bacon grease and scramble eggs.
  4. Lay out crescents on a parchment lined pizza pan in a star formation (the longer sides of each crescent on the inside with the pointed ends pointing out.)
  5. Layer with scrambled eggs, then veggies, then cheese, and then sprinkle on the bacon bits.
  6. Fold the pointed ends to the center.
  7. Place in oven and bake for 15-17 minutes, or until golden brown.
  8. Slice into quarters with a side salad and soup to make it into a meal for 4.

I was rushing, so Hubby and I just had that for dinner. We each had half of the pie and it was yummy and filling with a huge glass of milk each. :D


Monday, April 1, 2013

Speedy Beefy Red Pepper Pasta Sauce

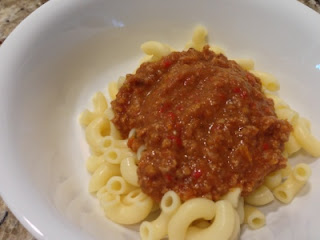
Speedy Beefy Red Pepper Pasta Sauce on MacaroniI love the texture of browned ground beef, but I don't always like to brown it. I hate frying things sometimes because of the oil splatters and I don't like cleaning all the oil out of the sieve to drain out all the fat from ground meat! Lazy? Yeah I guess so. Or you could think of it as "wanting to spend more time with K and less time in the kitchen"? Yes, let's go with that one. :)

Browning the meat will toughen it, so that's why you have to simmer for hours to make it tender again. Because I didn't brown it, I don't have to simmer it forever! I just need to do it long enough to get the meat cooked. Speedy trick, eh? The only thing is that the texture is not as nice as when you brown ground meat. However, if you're just going to mix it with pasta and bake it with other things (eg., Cream Cheesy Pasta Bake, lasagna) or serve it to a toddler, then it's not really noticeable. At least neither K nor I really notice it. ;)


Speedy Beefy Red Pepper Pasta Sauce
(makes ~6 cups)

Ingredients:
  • 2 red bell peppers, chopped
  • 2 small onions, chopped
  • 1 cup mushrooms, sliced
  • 1/4 tsp red chili flakes
  • 1 Tbsp dry Italian herbs (or mix of oregano, basil, sage, rosemary & thyme)
  • 4 garlic cloves, roughly chopped
  • 1 796ml (28oz) can of whole tomatoes
  • 2 Tbsps bacon grease or extra virgin olive oil
  • 1 1/2 lbs lean ground beef
  • Salt & freshly ground pepper to taste

Directions:
  1. Sweat onions, bell peppers and mushrooms in bacon fat (or evoo) in a large sauce pan for about 10 minutes. Stir in red chili flakes, Italian herbs, garlic, a pinch each of salt and pepper until fragrant.
  2. Add canned tomatoes and squish with spatula against the side of the pan. Puree veggies with a hand/stick blender.
  3. Stir in ground beef and break up chunks with spatula. Cover and simmer for 30 minutes.