Pages

Friday, March 29, 2013

Tuna Salad Wrap

Tuna Salad WrapIt seems like I'm always in need of a quick dinner. Sure, I have some frozen meals to dump into the slow cooker but I haven't been able to find anything I REALLY like (although I did find something I REALLY didn't like). Maybe I'm just not a fan of slow cooking? I know, right? The horror! It's like me and roast beef. I tried making it at least 5 different times with different recipes and always failed. Then I actually had some during a buffet dinner somewhere and decided that it's really just well done steak. So not a fan. So maybe I didn't really fail all those times, but it's just that Hubby and I don't like that kind of taste. So maybe it's the same for slow cooking...????? Who knows, but maybe I'll figure it out in a couple of years or at least after a few more attempts at frozen slow cooker meals.

In any case, I haven't had tuna salad in a while and (as usual) I needed a quick dinner. No bread in the house but I do have a couple of tortilla wraps left. Score! I even made it with some Greek yogurt to increase the protein and decrease the fat. That oughtta offset that box of chocolates I devoured at work earlier today...right? XD


Tuna Salad Wrap
(serves 2)

Ingredients:
  • 2 170g (7oz) cans of tuna, flaked with a fork
  • 1 Tbsp mayonnaise
  • 2 Tbsps Greek yogurt
  • 1 celery rib, finely diced
  • 3 Tbsps capers, drained & minced
  • Salt & freshly ground black pepper to taste
  • 2 flour tortillas
  • Butter/green/red lettuce or spring greens (optional)

Directions:
  1. Combine tuna, mayonnaise, Greek yogurt, celery, and capers in a small bowl and mix until well blended. Add salt and pepper to taste.
  2. Spread some lettuce (optional) in the center of 1 of the tortillas. Spoon one half of the tuna salad on top of the lettuce. Fold the sides over the filling and roll up into a wrap. Repeat for second wrap.
  3. Slice each wrap in half and serve with a side salad and soup. Enjoy!

Wednesday, March 27, 2013

Cream of Bacon Soup

Cream of Bacon SoupHello bacon! It was cold and I was craving a creamy soup for dinner. Hubby loves bacon and we haven't had cream of bacon soup in a while so I decided to whip up a batch. Hella good if you love bacon! Add some potatoes if you want to make it into a chowder. I think broccoli florets would be nice too.


Cream of Bacon Soup
(serves 2)

Ingredients:
  • 1/2 large onion, diced
  • 6-8 slices of bacon, chopped into 1 inch pieces
  • 1/4 cup all purpose flour
  • 2 cups milk
  • Salt and freshly ground pepper

Directions:
  1. In a large pot, sauté bacon pieces on medium high heat until crispy, stirring occasionally.
  2. Remove bacon bits with a slotted spoon into a separate bowl. Set aside.
  3. Add onions into the pot and sauté in bacon grease until onions are translucent.
  4. Make a brown roux by adding flour into the pot and cook until mixture is golden brown.
  5. Gradually add milk while whisking and scraping up any brown bits. Lower heat and simmer until soup is just starting to bubble.
  6. Stir in half of bacon bits. Add more milk if soup is too thick. It will thicken as it cools.
  7. Add salt and pepper to taste.
  8. To serve, pour into soup bowls and garnish with remaining bacon bits.

Sometimes I'll add more bacon bit cuz bacon is awesome. :)

I think I cooked mine down a little too much this time because it was really thick. But Hubby liked it so it's all good. It's plenty decadent, but if you want it even more so, use whole milk or cream. That'll be crazy decadent. :)


Monday, March 25, 2013

Apple Pie Muffins

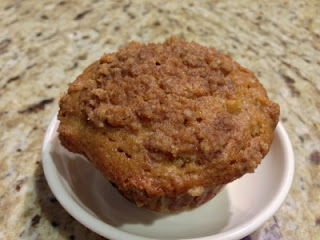
Apple Pie MuffinNeighbour Lady was super nice and power washed a part of our house. Lol. So I baked some muffins for her. Originally I wanted to make pie. But I'm always so unlucky when it comes to pie crusts. And I wanted to make an excuse to use my Winnie the Pooh muffin cup liners so I made Apple Pie Muffins lol

These are crazy moist. Neighbour Lady ate two right after I gave them to her the next day. I shared one with K (or rather h had the topping while I ate the rest of the muffin). Super yummy.


Apple Pie Muffins
(makes 14 muffins)

Ingredients:
  • 2 1/4 cups + 3 Tbsp all purpose flour, divided
  • 1 tsp baking soda
  • 1/2 tsp salt
  • 2 1/4 cups apples, diced
  • 1 1/2 cups + 3 Tbsp packed brown sugar, divided
  • 1 tsp vanilla extract
  • 1/2 cup + 1 Tbsp salted butter, melted & divided
  • 1 large egg, lightly beaten
  • 2 1/2 Tbsp white vinegar in enough milk to make 1 cup of "sour milk"
  • 1 Tbsp ground cinnamon

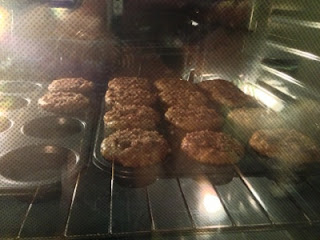
Apple Pie Muffins in the OvenDirections:
  1. To make the topping, combine 1 Tbsp of melted butter, 3 Tbsp of flour, 3 Tbsp of packed brown sugar and cinnamon until well blended in a small bowl. Set aside.
  2. To make the "sour milk" mixture, add vinegar and pour in enough milk to reach the 1 cup line in a liquid measuring cup. Set aside.
  3. Preheat oven to 375F. Line muffin tin with paper muffin cups.
  4. In a large bowl, stir together the baking soda, salt and rest of the flour. Set aside.
  5. In a medium bowl, mix together the egg, "sour milk" mixture, vanilla, rest of melted butter and brown sugar until the sugar has dissolved. Pour into the flour mixture and stir in the diced apples until everything is blended.
  6. Spoon into the prepared muffin tin, filling the cups to the top. Sprinkle the tops of the muffins with the topping.
  7. Bake for 25 minutes, or until the tops of the muffins spring back when lightly pressed.
  8. Let cool for 10 minutes before popping the muffins out of the tins. Enjoy warm or at room temperature.

Wednesday, March 13, 2013

White Chocolate Macadamia Nut Cookies

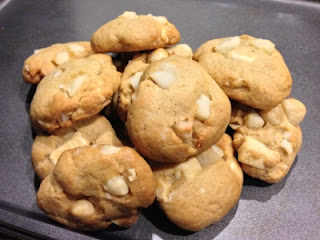
Cookies! I love these cookies. They're kind of cake-like. I've always loved white chocolate macadamia nut cookies, but the ones you buy from places like Bread Garden tend to be too sweet for my liking. That being said, I can barely finish one without feeling like a fatty. Sigh.

I typically won't bake because I don't like baking. But for some odd reason I just kept wanting to bake a few months ago. That's when I went researching and learning how to bake. Cookies, in particular. Of course I came along THIS recipe. It's EFFING delicious! I actually followed the recipe the first time I made it. Well. That's a lie. Because I put in a little more chocolate chips than on the recipe. It wasn't too much sweeter though, since I used bittersweet chocolate chip instead of the semisweet variety.

Since then, I've made my own little adjustments to it. I consider it a win since Hubby doesn't like sweets but he likes these a lot! Typically, I make them smaller (about 2 inches in diameter) so I don't feel as bad eating half a dozen of these in one sitting. Cuz you know. These are EFFING delicious! Lol!


White Chocolate Macadamia Nut Cookies on Cookie Sheet
White Chocolate Macadamia Nut Cookies
(makes about 5 dozen small cookies)

Ingredients:
  • 3 cups all purpose flour
  • 1 tsp baking soda
  • 1 tsp sea salt
  • 1 cup cold salted butter, cut into 1/2-inch pieces
  • 3/4 cup granulated sugar
  • 1 1/2 cups packed brown sugar
  • 1 Tbsp vanilla extract
  • 2 large eggs, at room temperature
  • 1/2 cup which chocolate chunks or chips
  • 1/2 cup macadamia nuts

White Chocolate Macadamia Nut CookiesDirections:
  1. Combine the flour, baking soda, and salt into a medium bowl and set aside. Sift if you want, but I usually don't bother.
  2. Using a stand mixer fitted with a paddle attachment or a hand mixer, cream the butter and sugars on low speed until it is smooth and lump free, about 3 minutes. Stop the mixer and scrape down the sides of the bowl and the paddle.
  3. Add the vanilla and egg and beat on low speed for about 30 seconds, or until fully incorporated. Do not overbeat. Stop the machine and scrape down the sides of the bowl and the paddle.
  4. On low speed, add the flour mixture. Beat until just incorporated. Scrape down the sides of the bowl. Add the chocolate chunks and mix until they are just incorporated. If using a hand mixer, use a wooden spoon to stir them in. Refrigerate dough for at least an hour, preferably overnight.
  5. Preheat oven to 350F. Adjust racks to lower and upper thirds of the oven.
  6. Roll a tablespoon worth of dough into a ball and press into a 1 1/2 inch disk. Set on cookie sheets, an inch apart.
  7. Bake for 7 minutes. Turn the sheets front to back and switch racks and bake for another 5-7 minutes or until golden brown around the edges but still soft, almost underdone-looking, in the center.
  8. Remove the sheets from the oven and let the cookies set for about 5 minutes before removing them to a cooling rack. Wait at least another 5 minutes before serving or 20 minutes before storing in an airtight container for up to 3 days at room temperature.
  9. Best served with a tall glass of milk or some vanilla bean ice cream sandwiched between two cookies.

I'll typically just use salted butter for baking. Most dessert recipes call for unsalted, but I don't care. I just use less salt than a recipe will call for. Assuming I follow the directions to a T. :P

If you don't have time to leave your eggs out to get it to room temperature, just put them in a cup of hot water for a few minutes while you cream the butter with sugars.


Monday, March 11, 2013

Baked Soy Ginger Chicken

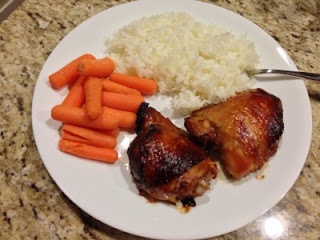
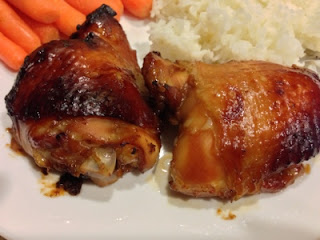
Baked Soy Ginger Chicken with Rice & Steamed Baby CarrotsI haven't had this in a long long time. It's fairly quick and super easy. Make rice in rice cooker, bake chicken and steam veggies while everything else cooks. Perfect for when you gotta bathe a toddler and have dinner on the table ASAP!


Baked Ginger Soy Chicken
(serves 2)

Ingredients:
  • 4 bone in chicken thighs
  • 1/3 cup soy sauce
  • 1/3 cup mirin
  • 2 Tbsp sugar
  • 2 Tbsp ginger, grated

Baked Soy Ginger ChickenDirections:
  1. Place everything in a large Ziploc bag, squeezing out all the air before zipping up. Massage and marinade for 6 hours or overnight.
  2. Preheat oven to 375F.
  3. Place chicken thighs, skin side up, on a foil/parchment paper lined baking tray.
  4. Bake for 35 minutes. Place aluminum foil on top of chicken thighs if they start to burn.
  5. Pour marinade in a small sauce pan and simmer on medium low heat until sauce boils.
  6. Serve chicken on rice with sauce drizzled over chicken and a side of steamed veggies.

I experimented by putting a little more sugar in while simmering and accidentally ended up burning it. Teeheehee. Oh well. Lesson learned. I think I might just leave it as is or use a cornstarch slurry to thicken it up next time.


Friday, March 8, 2013

Fluffy Blueberry Pancakes

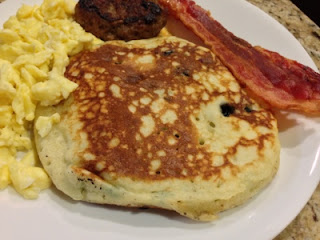
Fluffy Blueberry Pancakes on Breakfast Dinner PlateHubby LOVES fluffy pancakes. The fluffier, the better. He even loves them more than waffles. What a weirdo, right?

I love this recipe. It's my go-to recipe whenever I want to make pancakes. The blueberries make them little healthier, what with their antioxidant properties. Plus we just have them in the freezer all the time for when I make K's blueberry oatmeal. ;)


Fluffy Blueberry Pancakes
(makes 4 large pancakes)

Ingredients:
  • 3/4 cup milk
  • 2 Tbsp white vinegar
  • 1 cup all purpose flour
  • 2 Tbsp sugar
  • 1/2 tsp baking soda
  • 1 tsp baking powder
  • 1 tsp salt
  • 2 Tbsp butter, melted
  • 1 tsp vanilla
  • 1 egg, lightly beaten
  • 4 tsp extra virgin olive oil, divided
  • 1/2 cup frozen/thawed/fresh blueberries, divided

Plain Fluffy Pancake Directions:
  1. If using frozen blueberries, take the blueberries out of the freezer and let it sit while you get everything together. It'll give it time to thaw a bit.
  2. Combine milk with vinegar in a small bowl or a measuring cup and set aside to "sour" while you get the rest of the ingredients together.
  3. In a large mixing bowl, combine flour, sugar, baking soda, baking powder and salt. Mix well.
  4. Pour in "sour" milk, melted butter, vanilla and egg. Whisk until lumps are gone.
  5. Heat a large frying pan over medium heat, and coat with 1 tsp of extra virgin olive oil. Pour 1/4 of batter onto the pan, and drop 2 Tbsp of blueberries into the pancake. Cook until bubbles appear on the surface. Flip with a spatula, and cook until browned on the other side. Continue this with the other 3 pancakes.
  6. Serve with butter and maple syrup.

You can always just fold in the blueberries into the batter before cooking, but then you run the risk of the blueberries breaking and turning your batter blue/purple. It's nice if you like it that way, but I like the look of regular pancaked dotted with blueberries. Alternatively, you can also set 1/4 cup of the flour aside and dredge the blueberries in the flour before folding into the batter. That'll also keep the blueberries in a solid state. HOWEVER, that's so much work! I'd rather just drop them into the pancakes while they're on the pan. ;)

The above picture is of a plain pancake. I've been making them plain for years. Maybe I'll add some grated apples in them instead for a change...


Wednesday, March 6, 2013

Breakfast Sausage Patties

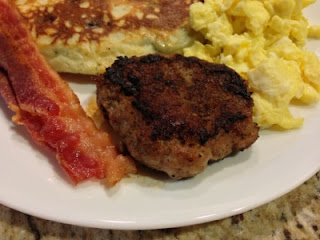
Breakfast Sausage Patties on Breakfast Dinner PlateI love breakfast for dinner. Who wouldn't? It's actually the best time to MAKE breakfast in my opinion. I mean...who really wants to get up super early to make breakfast sausages and pancakes from scratch while cooking eggs and bacon? I know I don't. But that's probably because I'm not that fast of a cook. I really should learn to organize myself some more. It'd probably help me spend less time in the kitchen cooking. Lol. Maybe one day I'll do it. I"m sure I will. Just not now. Maybe tomorrow. Or the day after. Or the day after that.....


Breakfast Sausage Patties
(makes 6 small or 4 large patties)

Ingredients:
  • 1 lb lean ground pork
  • 1/4 tsp crushed red pepper flakes
  • 1/4 tsp ground allspice
  • 1/4 tsp dried basil
  • 1/2 tsp ground black pepper
  • 1 tsp salt
  • 1 tsp dried sage
  • 1 1/2 tsp packed brown sugar
  • 1 Tbsp extra virgin olive oil

Breakfast Dinner Plate Directions:
  1. Mix everything, EXCEPT olive oil, together in a medium bowl.
  2. Split meat mixture into 4 or 6 sections and form each section into a patty. Make a thumbprint in the middle of each patty.
  3. Heat oil in a large frying pan on medium high heat. Fry patties 5 minutes on each side or until internal temperature reaches 160F.
  4. Serve with bacon, eggs, toast, pancakes, waffle, etc.

I burnt my sausages a little. Whoops. Distractions will do that to you. They were still yummy though! Super juicy.

I had prepped the sausage patties a couple of hours and put them in the fridge before I fried them. If you're going to do that, it's a good idea to take them out 15-20 minutes before you cook them, just to take the chill off. It makes for more even cooking. And putting a thumbprint in the middle of the patties make them "dome up" a little less.


December 21, 2015 Update: I now make these super thin (faster cooking and better for sandwiches) and freeze them between layers of waxed paper in a ziploc bag. I just defrost them using the microwave when I wanna cook them in the morning and then pan fry them.